Diagnostic Ultrasound: The Basics of Knee Ultrasound
Cite as: Barbari C, Patel D, Rosado RP, et al. Diagnostic ultrasound: the basics of knee ultrasound. ASRA Pain Medicine News 2025;50. https://doi.org/10.52211/asra110125.013.
Photographs and ultrasound images were taken with the patient's permission.
Diagnostic musculoskeletal ultrasound is increasingly being used as a diagnostic imaging modality. The goal of this newsletter series is to introduce the basics of diagnostic musculoskeletal ultrasound, starting with high-yield joints such as the knee, shoulder, and hip. The first article in this series focuses on the knee joint, reviewing frequently encountered pathologies as well as practical, image-guided “how-to” content designed for learners and clinicians at all levels.
Introduction
Ultrasound is a non-invasive imaging modality that utilizes high-frequency sound waves to visualize soft tissues in real-time. It is widely used across medical specialties due to its safety, portability, and cost-effectiveness. Diagnostic ultrasound, particularly in musculoskeletal medicine, allows for dynamic assessment of tendons, ligaments, bursae, and joint spaces, making it an ideal tool for evaluating knee pain and guiding clinical decision-making at the bedside.
Basic Considerations
A diagnostic knee ultrasound can be performed with the patient in either a supine or seated position, depending on the region of interest and the patient's comfort. In ultrasound imaging, each structure must be scanned in both longitudinal and transverse planes. Anisotropy, a common artifact in tendon imaging where structures appear artificially hypoechoic due to beam angle or lack of gel, must be corrected to avoid misdiagnosis.1 Dynamic scanning enhances functional assessment, allowing the examiner to evaluate joint effusions during compression, tendon movement during flexion/extension, and ligament integrity with stress maneuvers.2
Transducer/Positioning
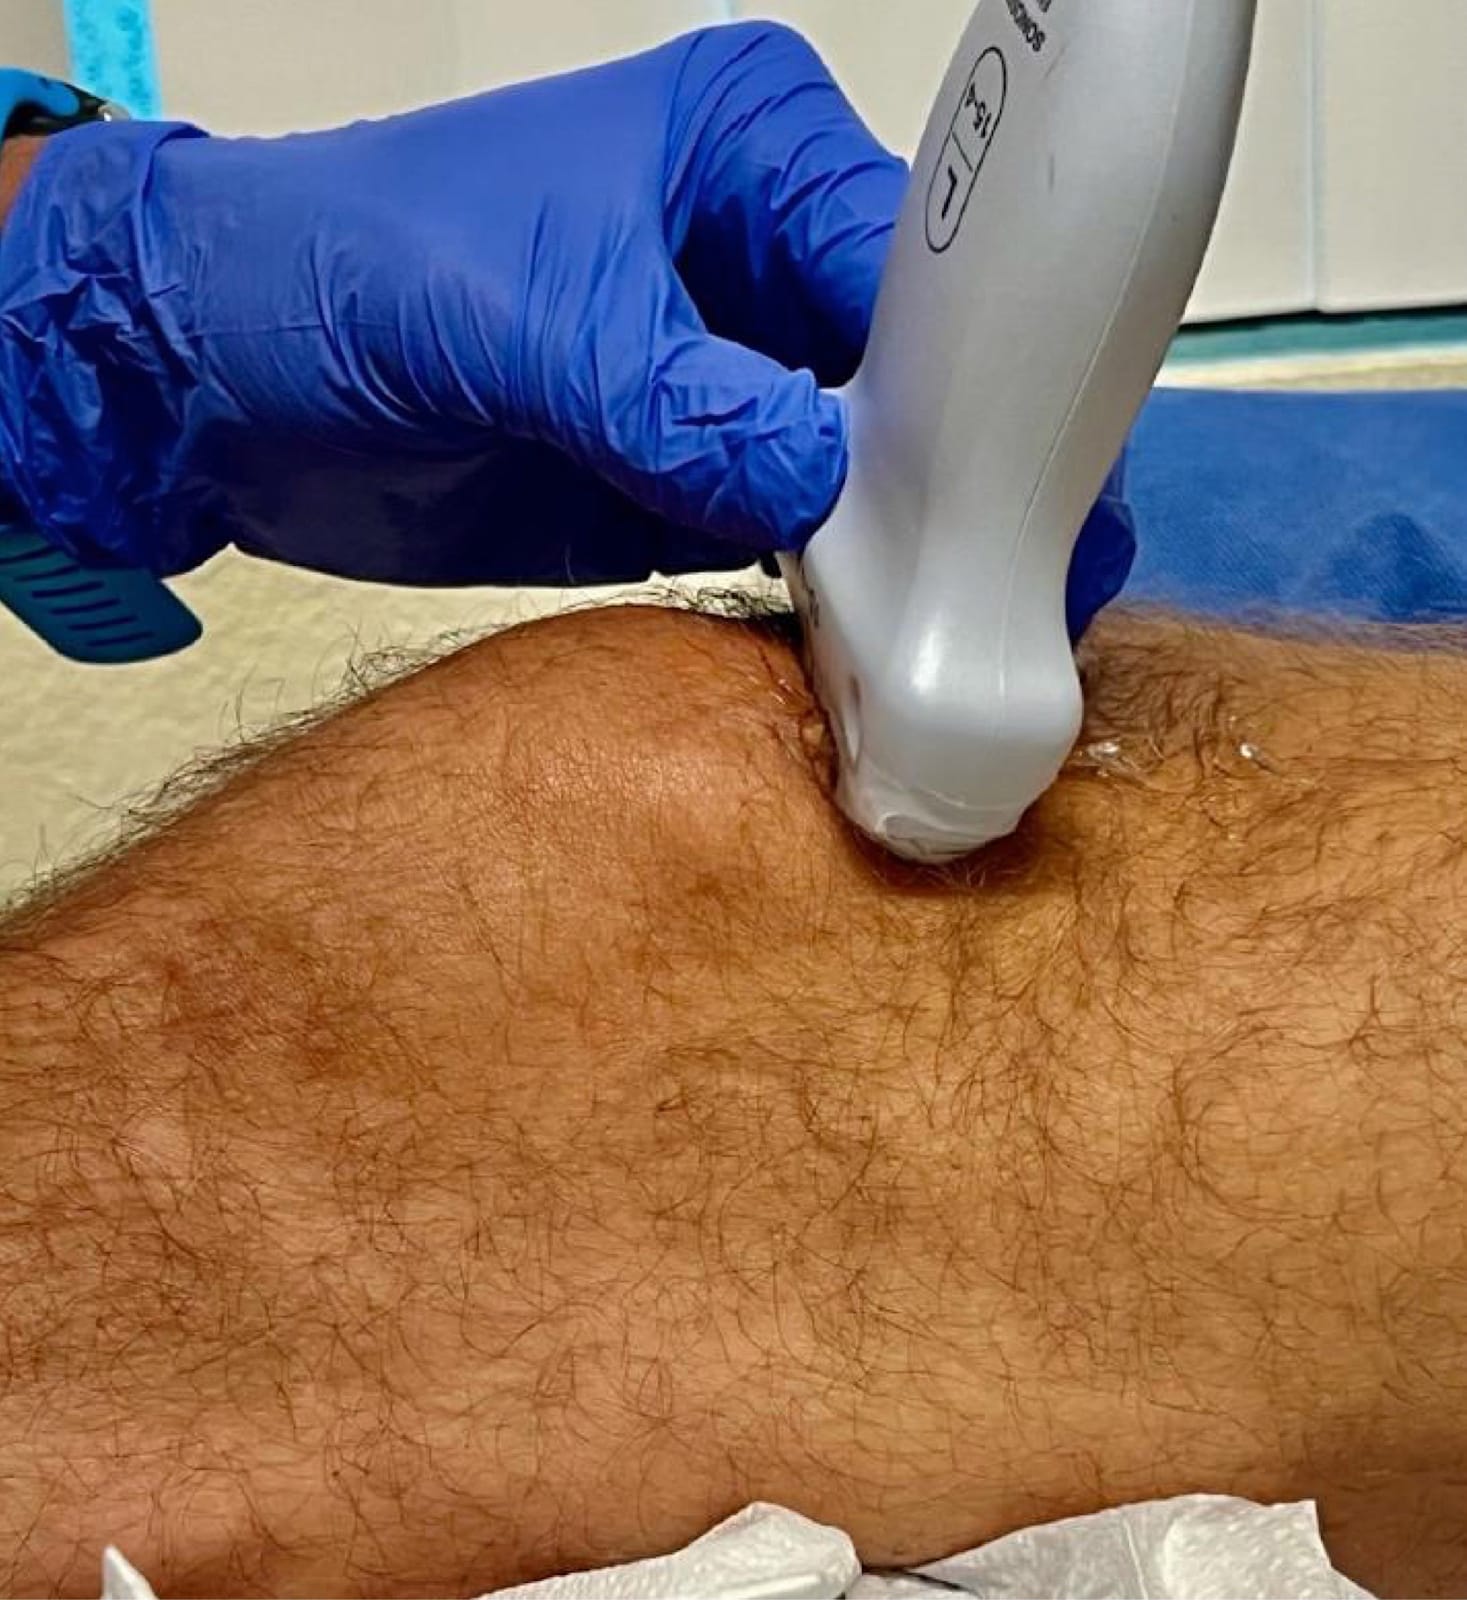
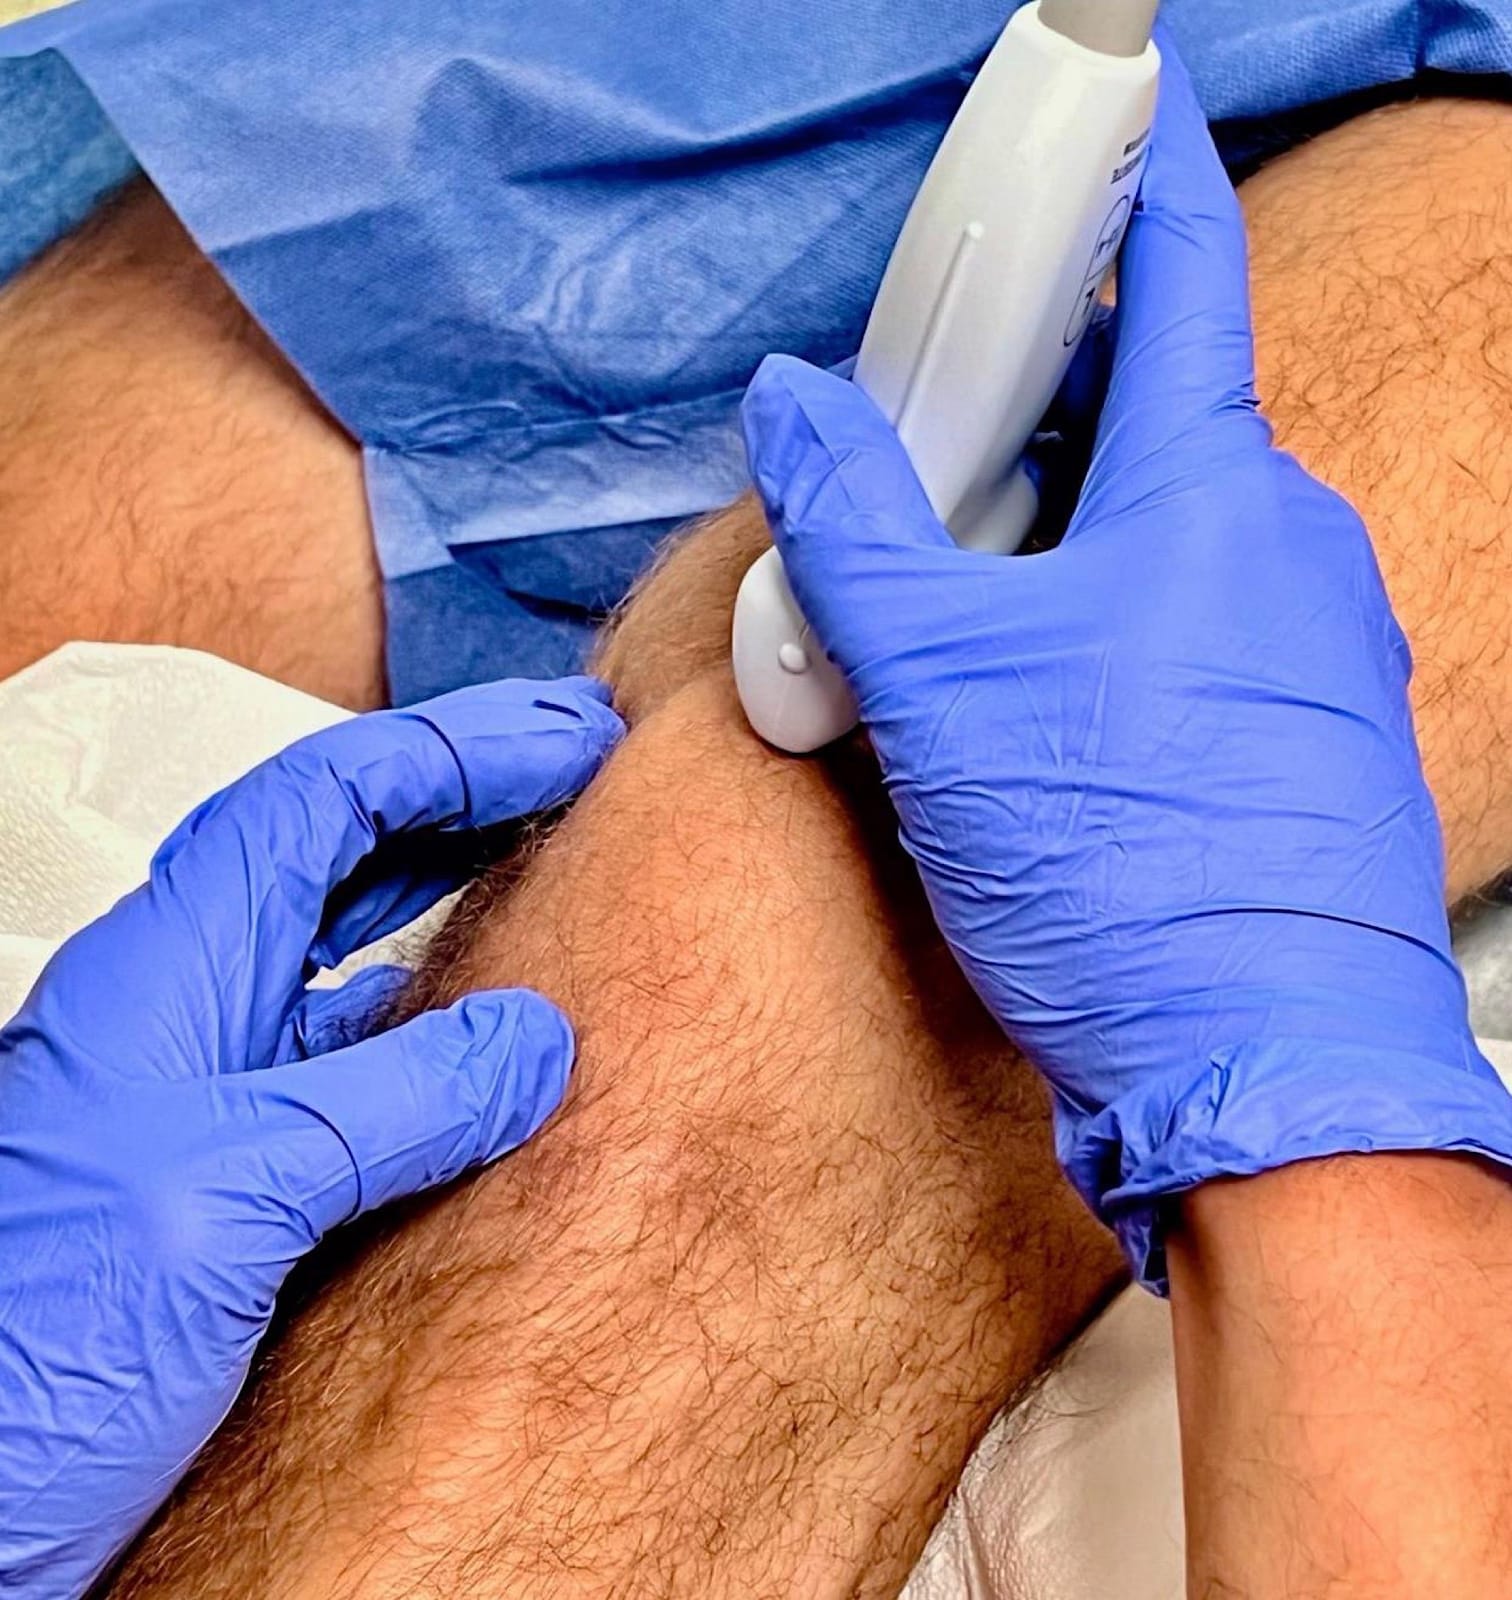
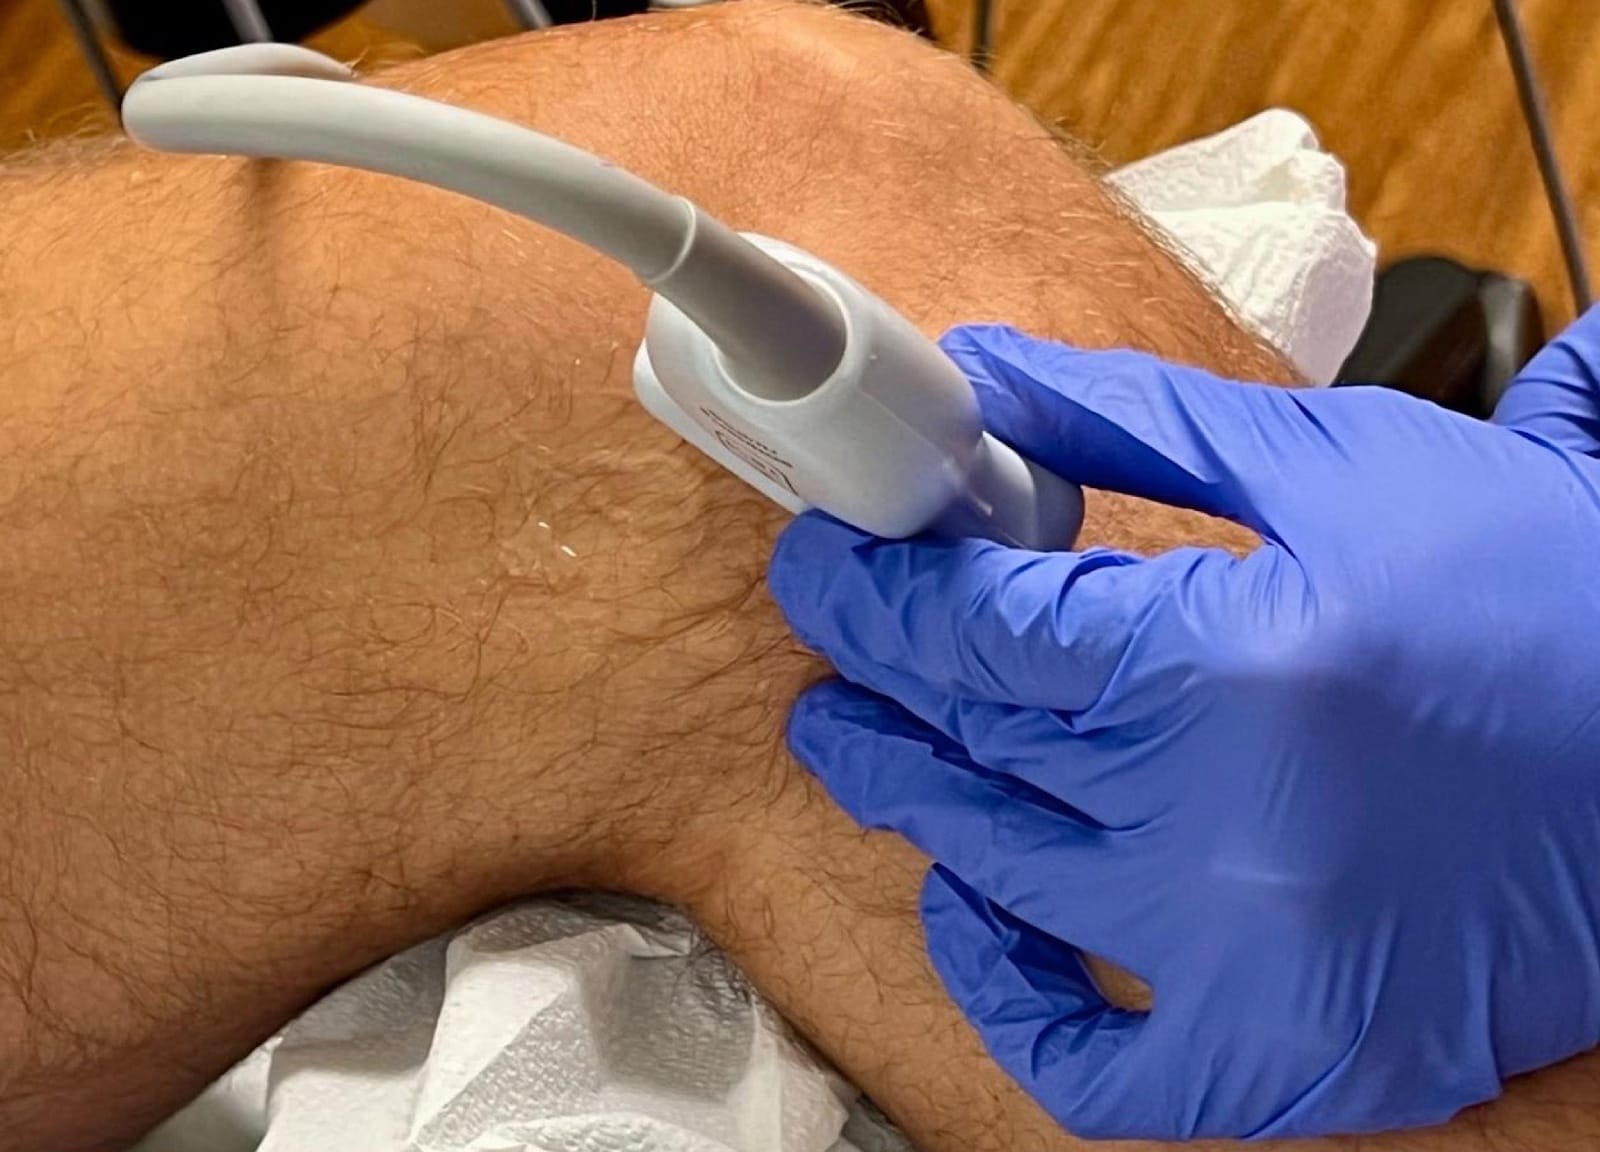
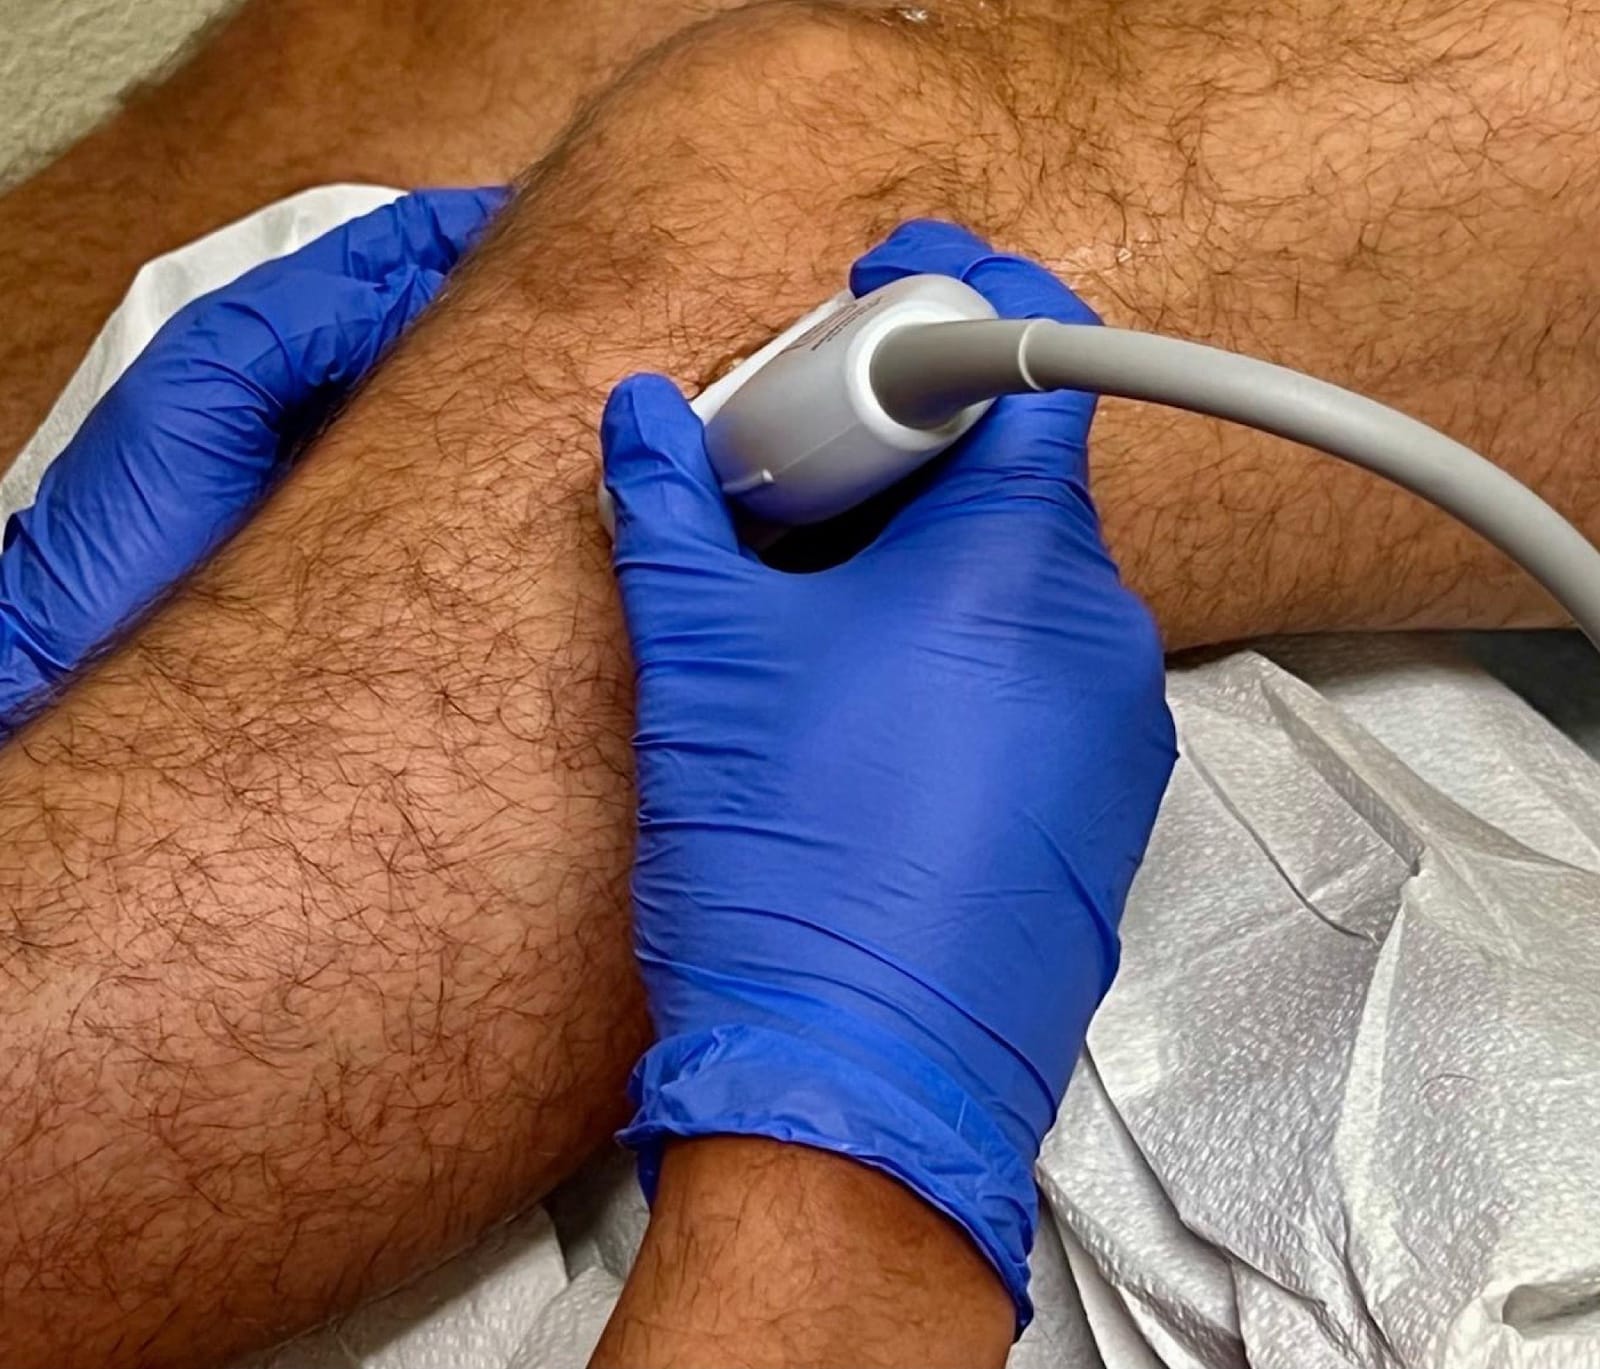
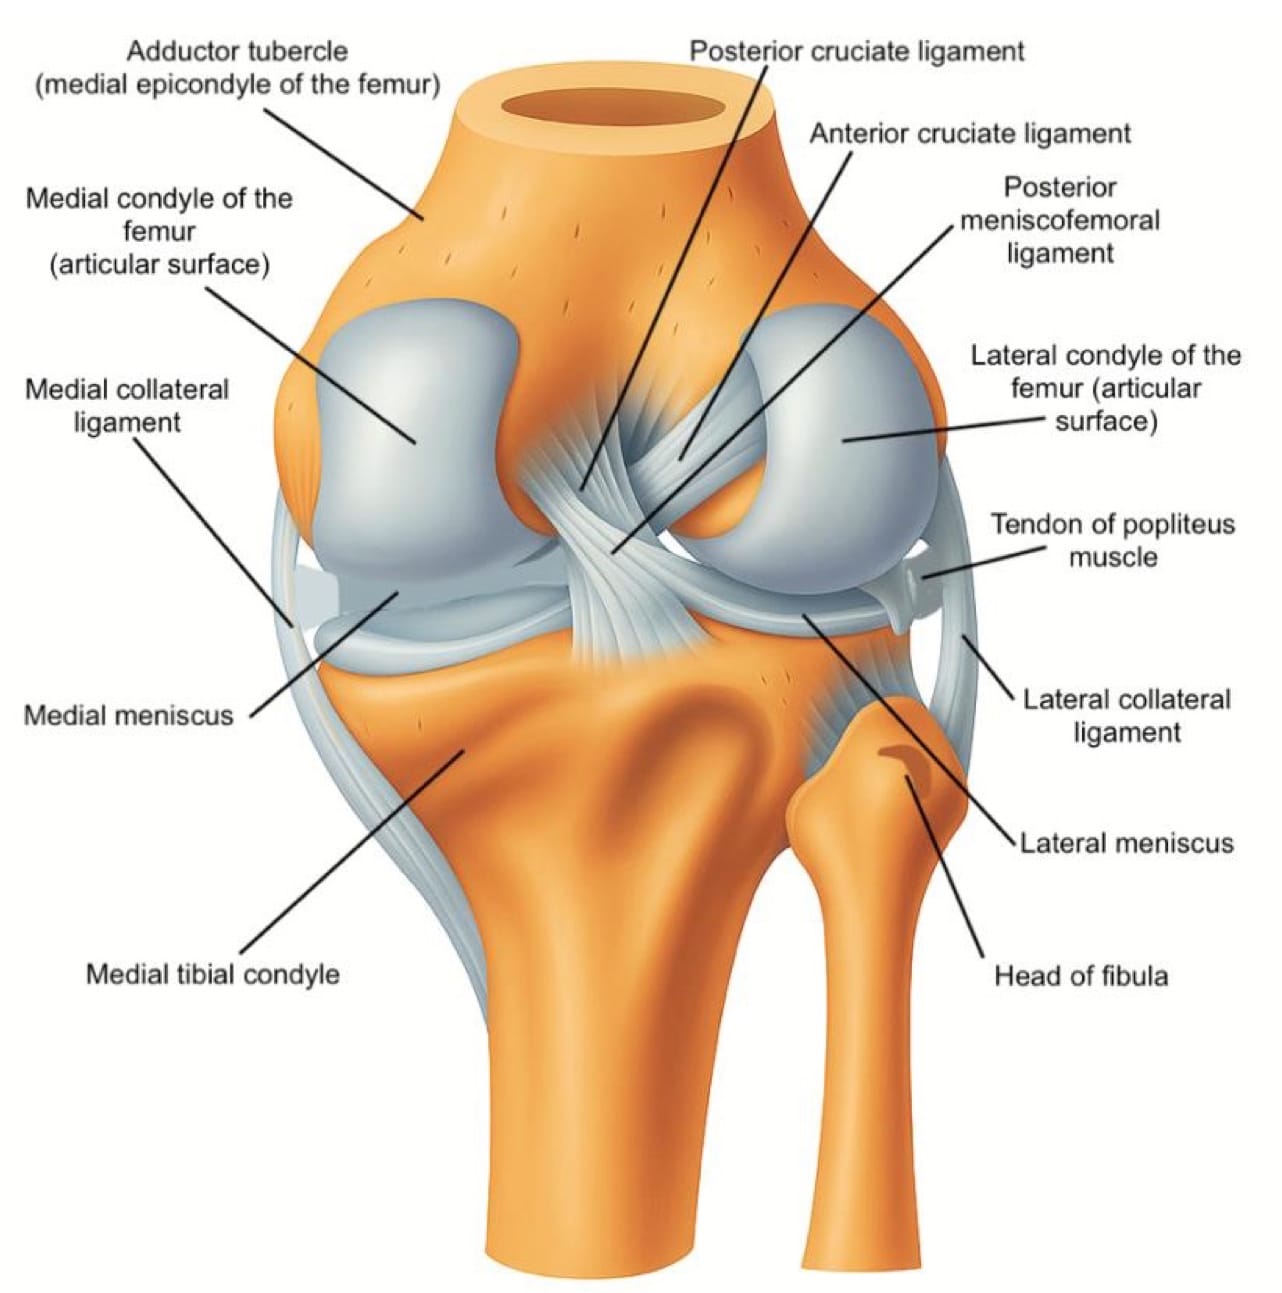
We recommend a high-frequency linear transducer (12–18 MHz). Providers can switch to a lower frequency transducer for larger body habitus or deeper structures. For anterior/medial and lateral visualization, the patient should be supine with the knee slightly flexed at 20–30° on a towel roll (Figures 1A and B, 2, and 3). For posterior, the prone position is preferred (Figure 4).
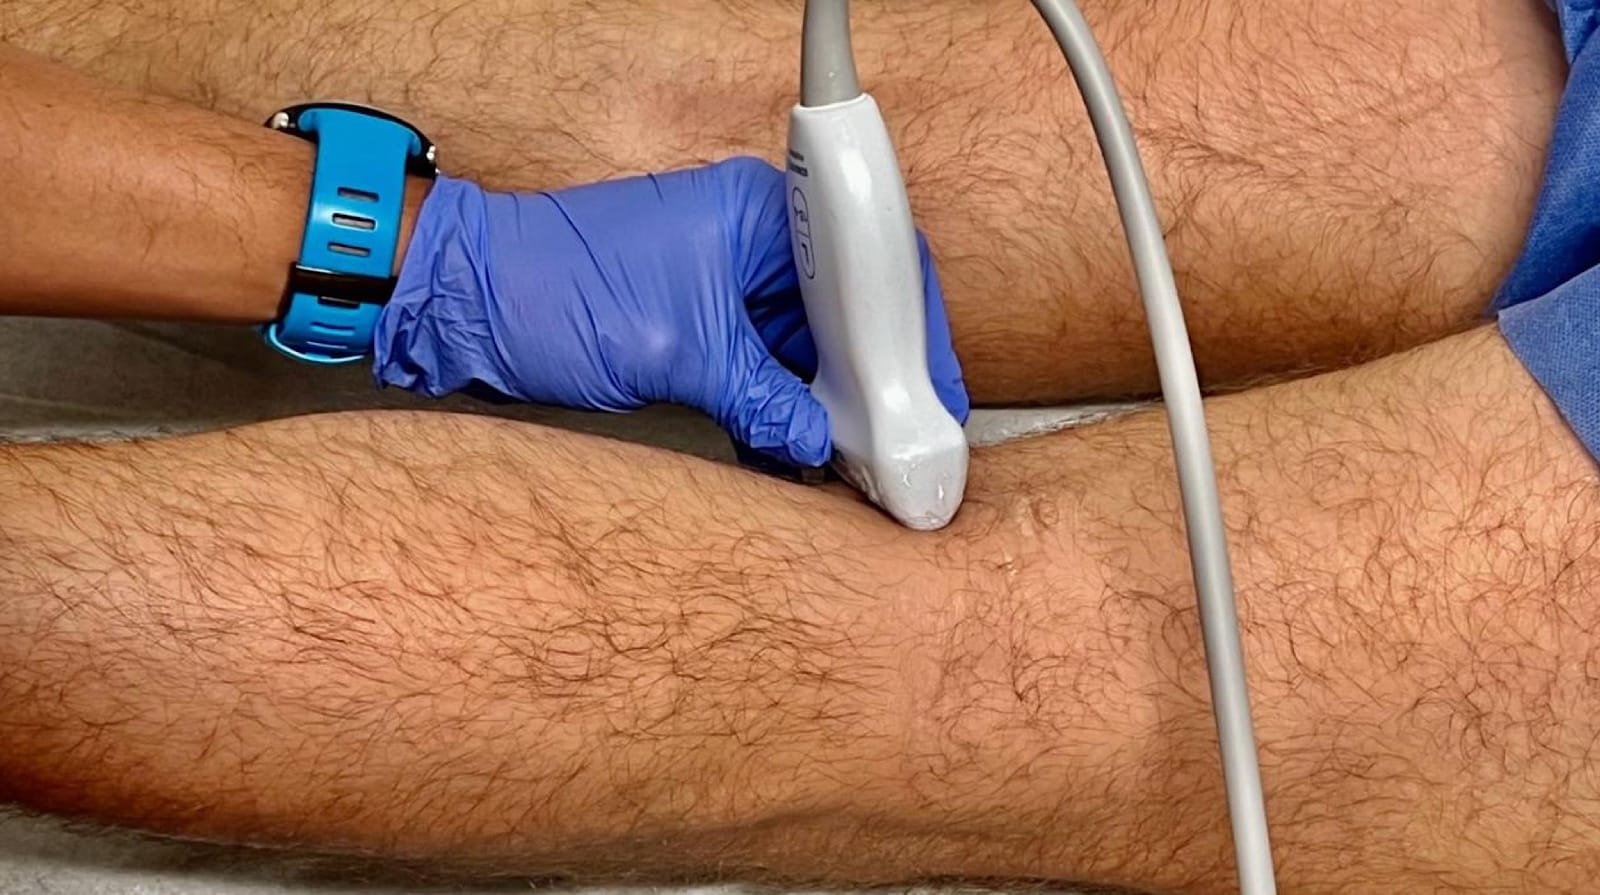
Anterior Knee
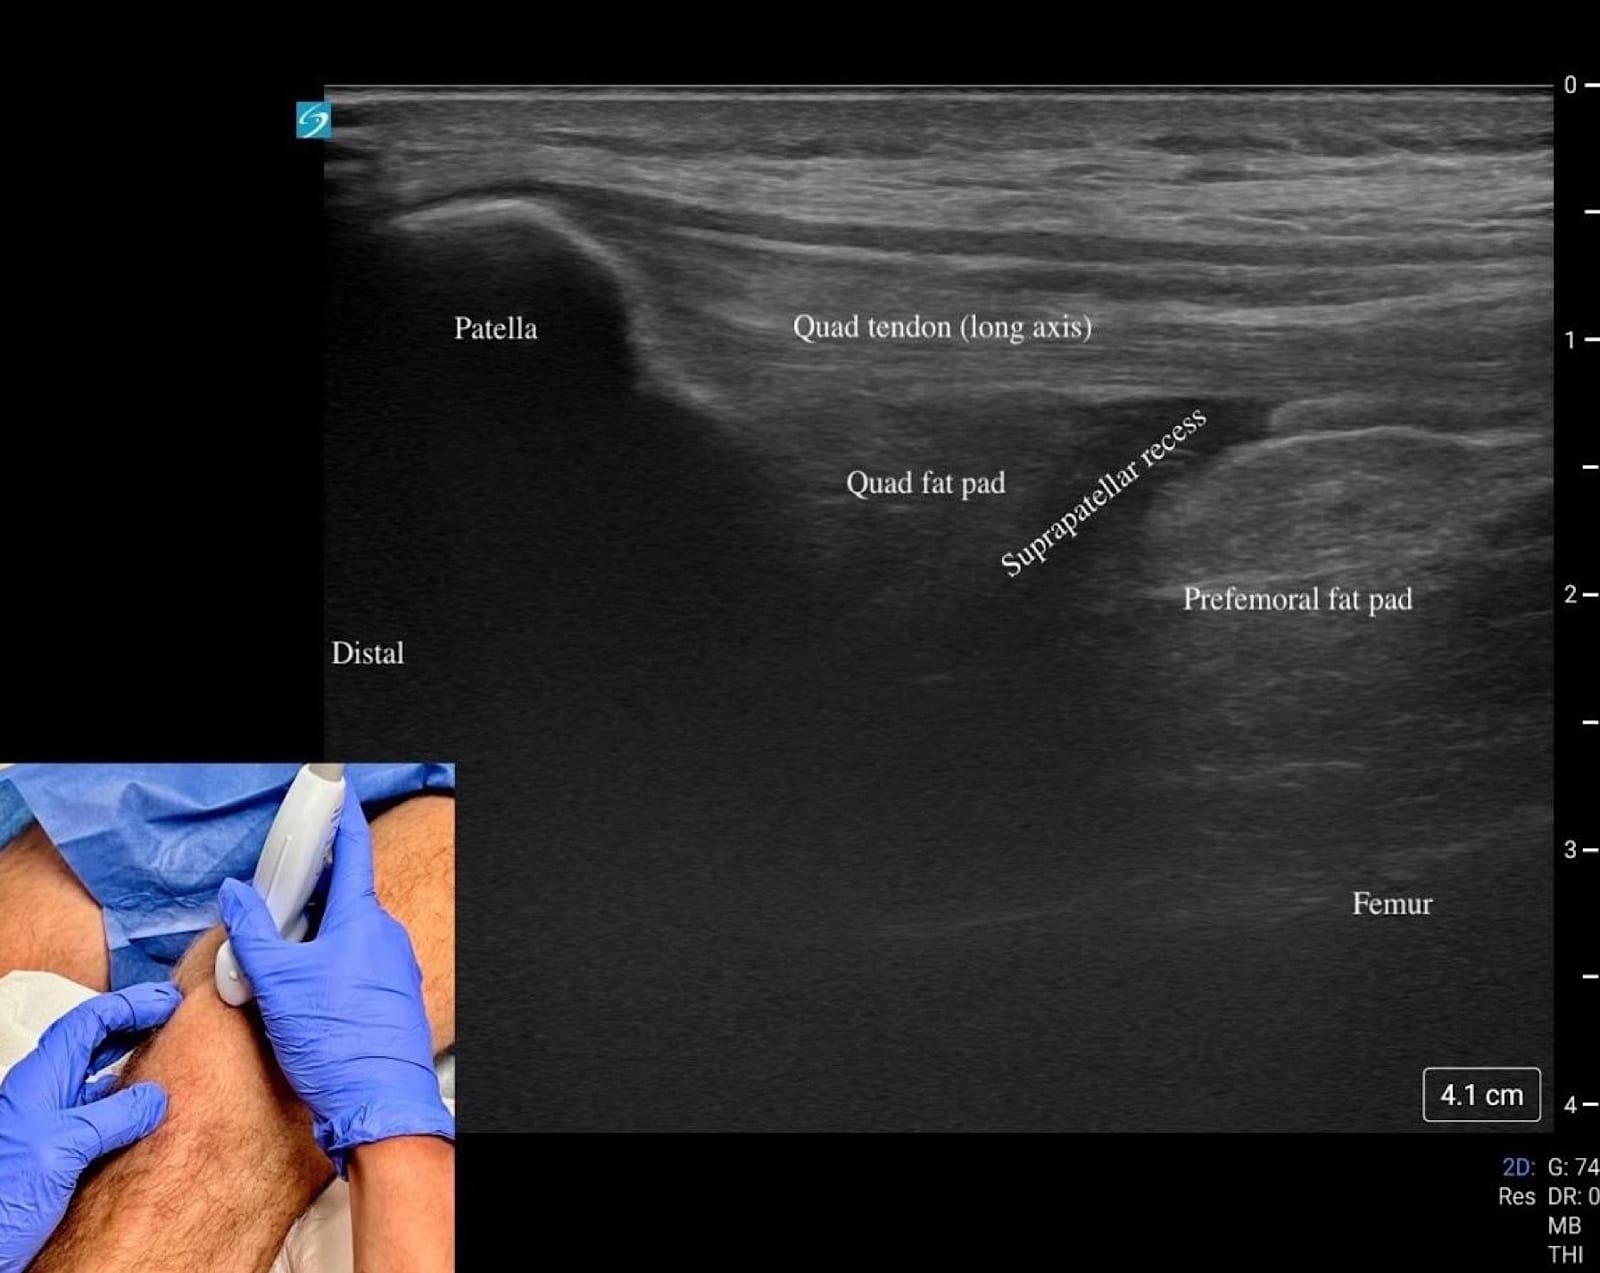
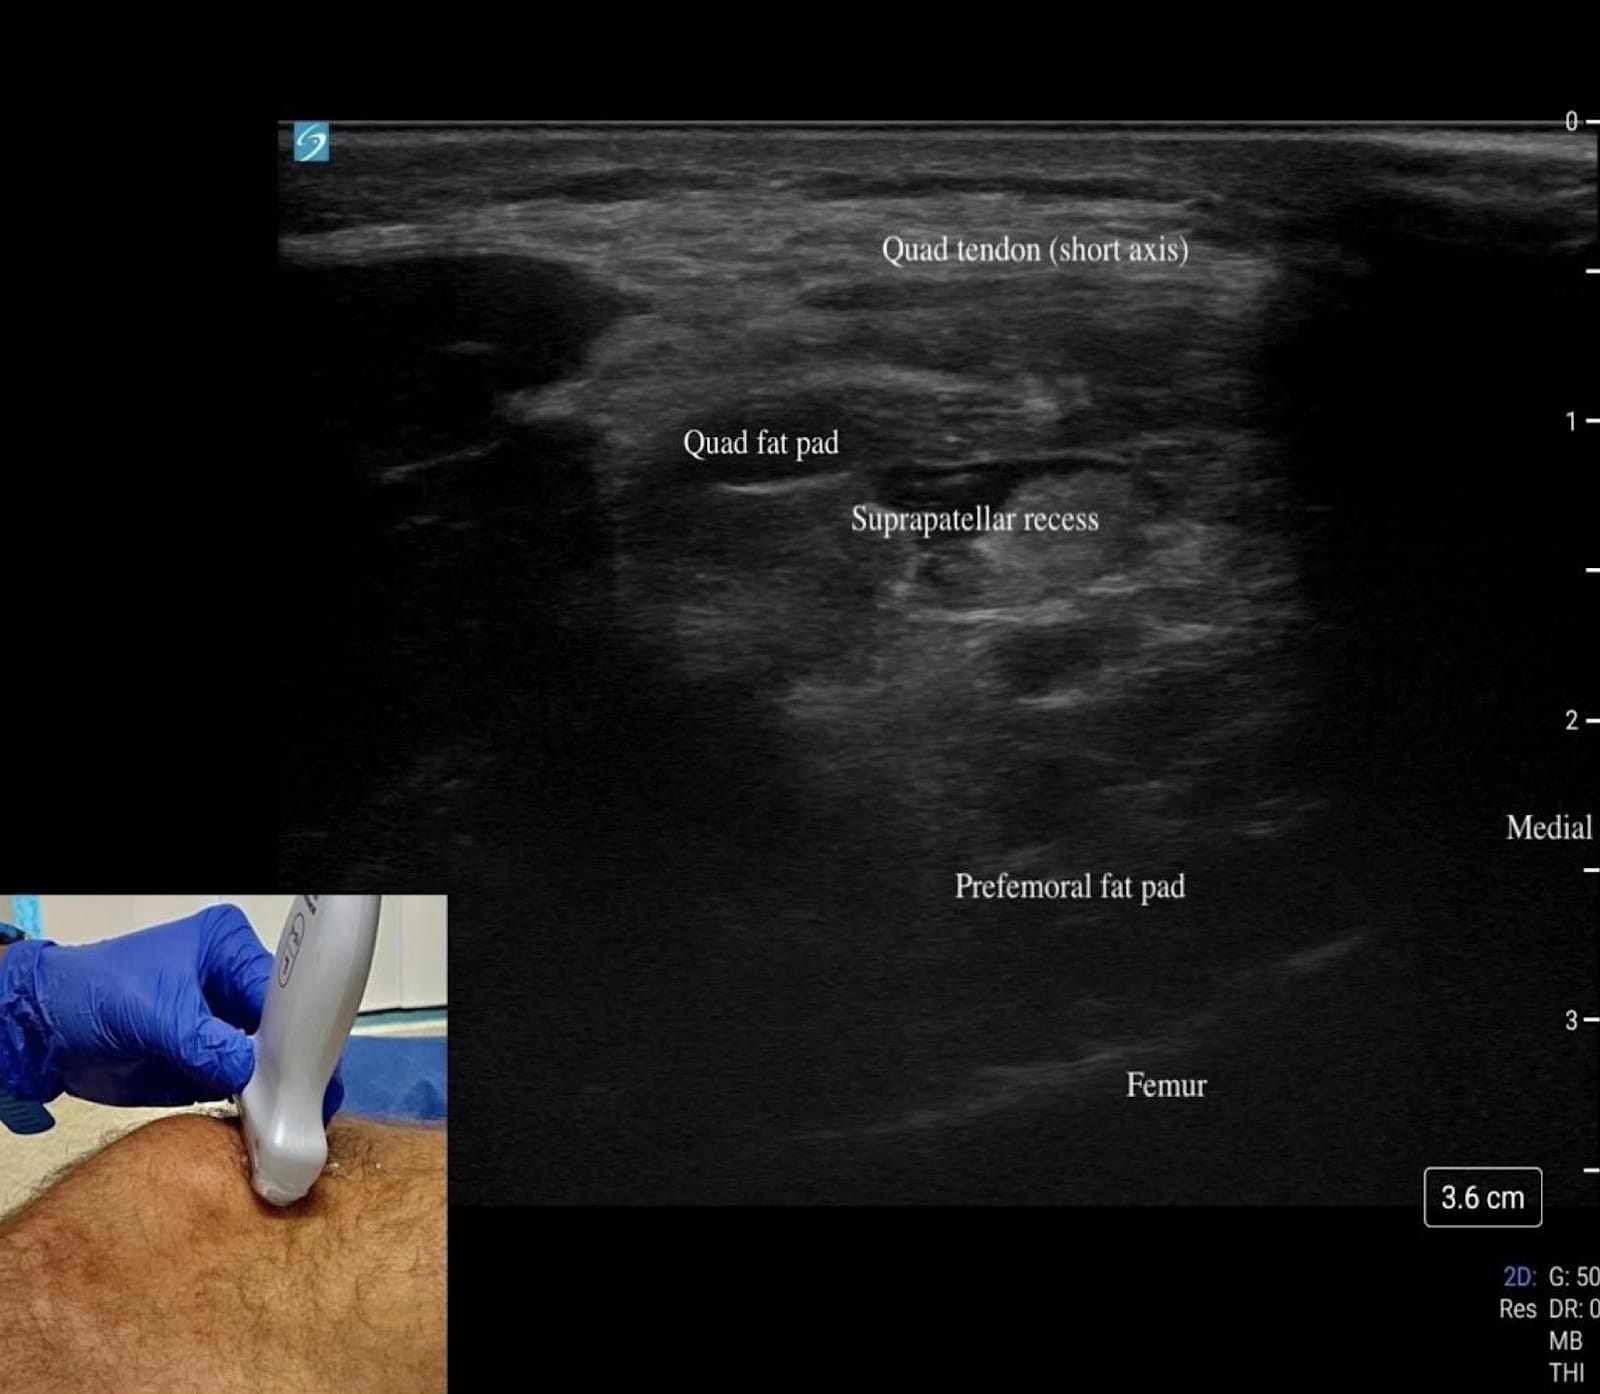
Begin by placing the transducer in short axis over the quadriceps muscle (“home base”). Rotate into long axis and scan distally over the tendon to the superior pole of the patella (Figures 1A and B).
Just beneath the tendon lies the quadriceps fat pad, followed by the suprapatellar recess, which appears as an anechoic stripe when effusion is present (Figures 5C, D).
The prefemoral fat pad above the femur provides another landmark. Continue to the patella itself in both long and short axis, assessing for cortical irregularities, fracture, or bipartite variants. Between the skin and bone lies the prepatellar bursa, a potential space for fluid that is best evaluated with minimal transducer pressure, and plenty of gel (Figure 5B).
From the patella, trace the patellar tendon distally in long axis toward its tibial insertion, then rescan in short axis for completeness. At the tibial tubercle, evaluate the tendon attachment as well as the adjacent bursae.
The superficial infrapatellar bursa lies superficial to the distal aspect of the patellar tendon, while the deep infrapatellar bursa sits slightly proximally and beneath it against the tibia. Of note, the deep infrapatellar bursa typically contains physiologic fluid, whereas the superficial infrapatellar bursa does not usually contain fluid under normal conditions. Deep to the tendon throughout its course is Hoffa’s fat pad, a bright or hyperechoic structure that should be assessed for contour or echogenicity changes.
Key Structures: Quadriceps tendon, patella, patellar tendon, suprapatellar recess (Figures 5A-D).
Pathology
- Tendinopathy – thickened, hypoechoic tendon +/- calcifications, Doppler hyperemia.
- Effusion – anechoic/hypoechoic fluid in suprapatellar recess; Doppler/irregular lining suggests synovitis.
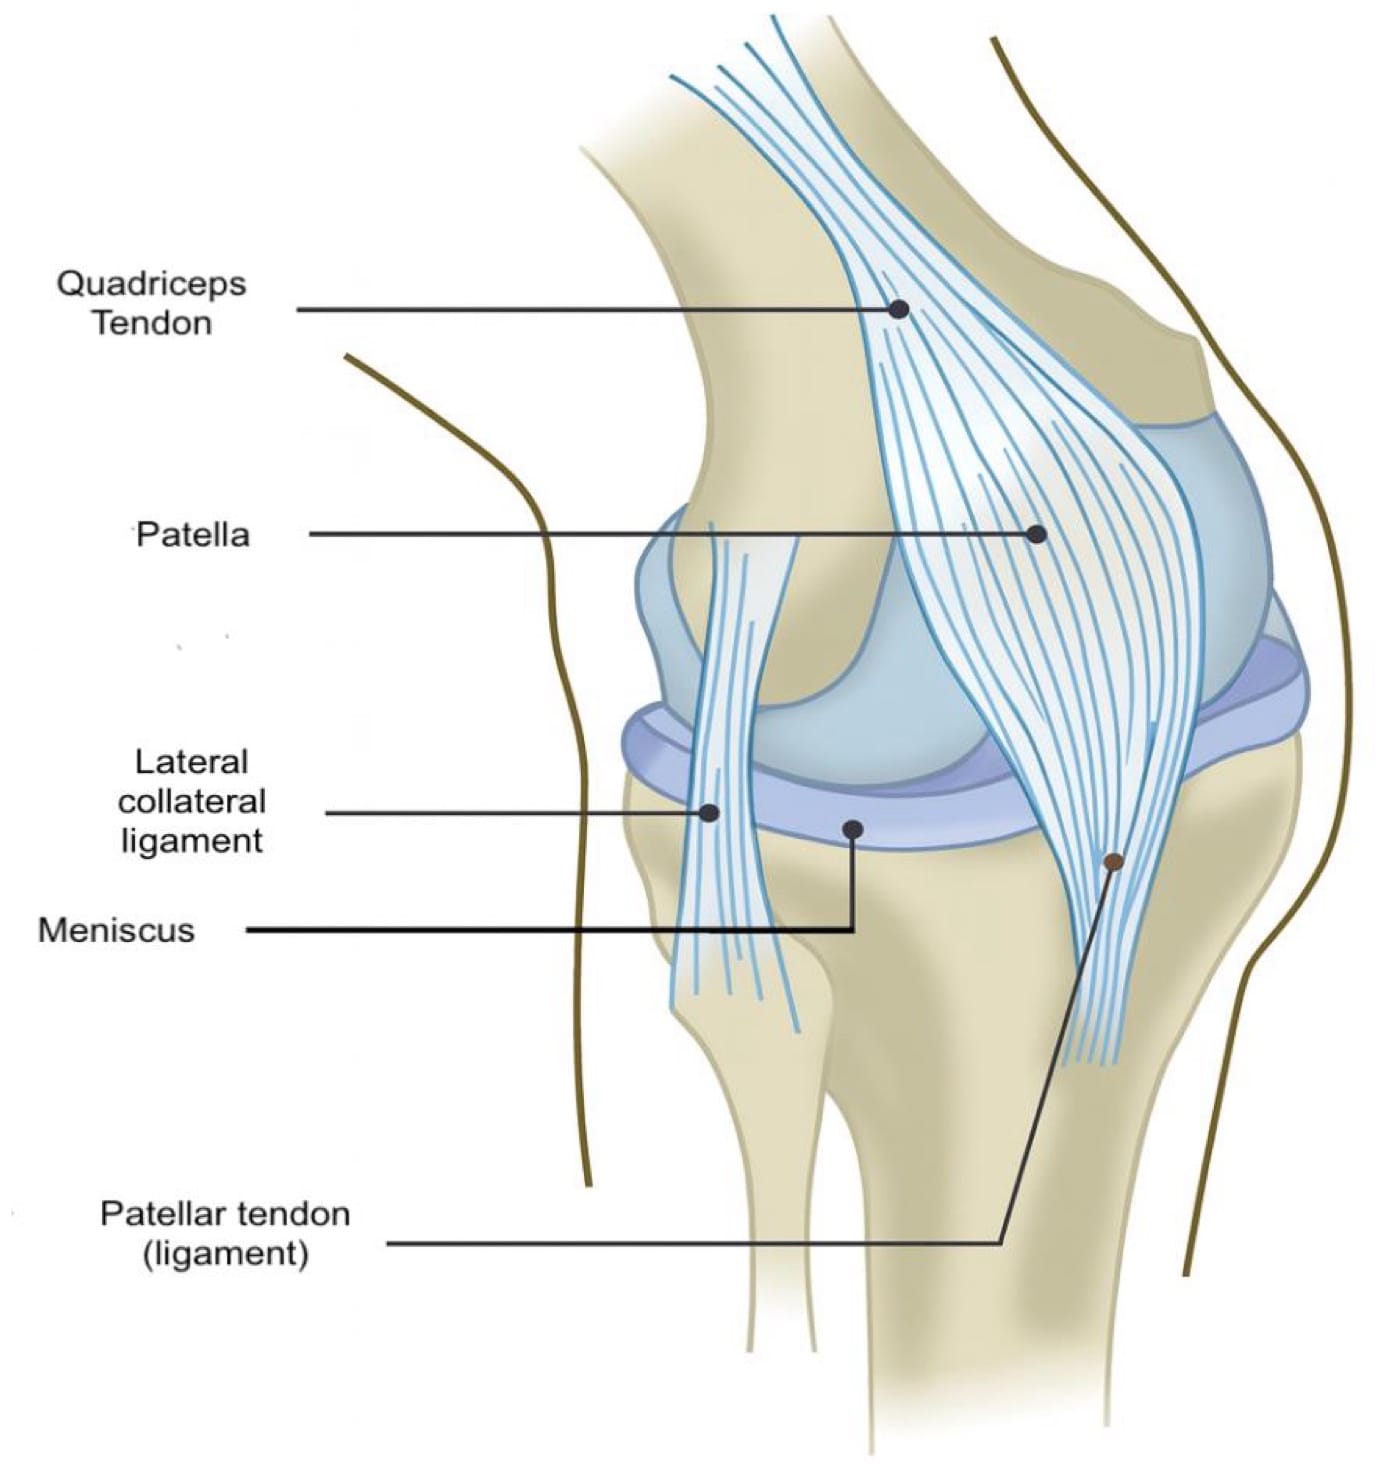
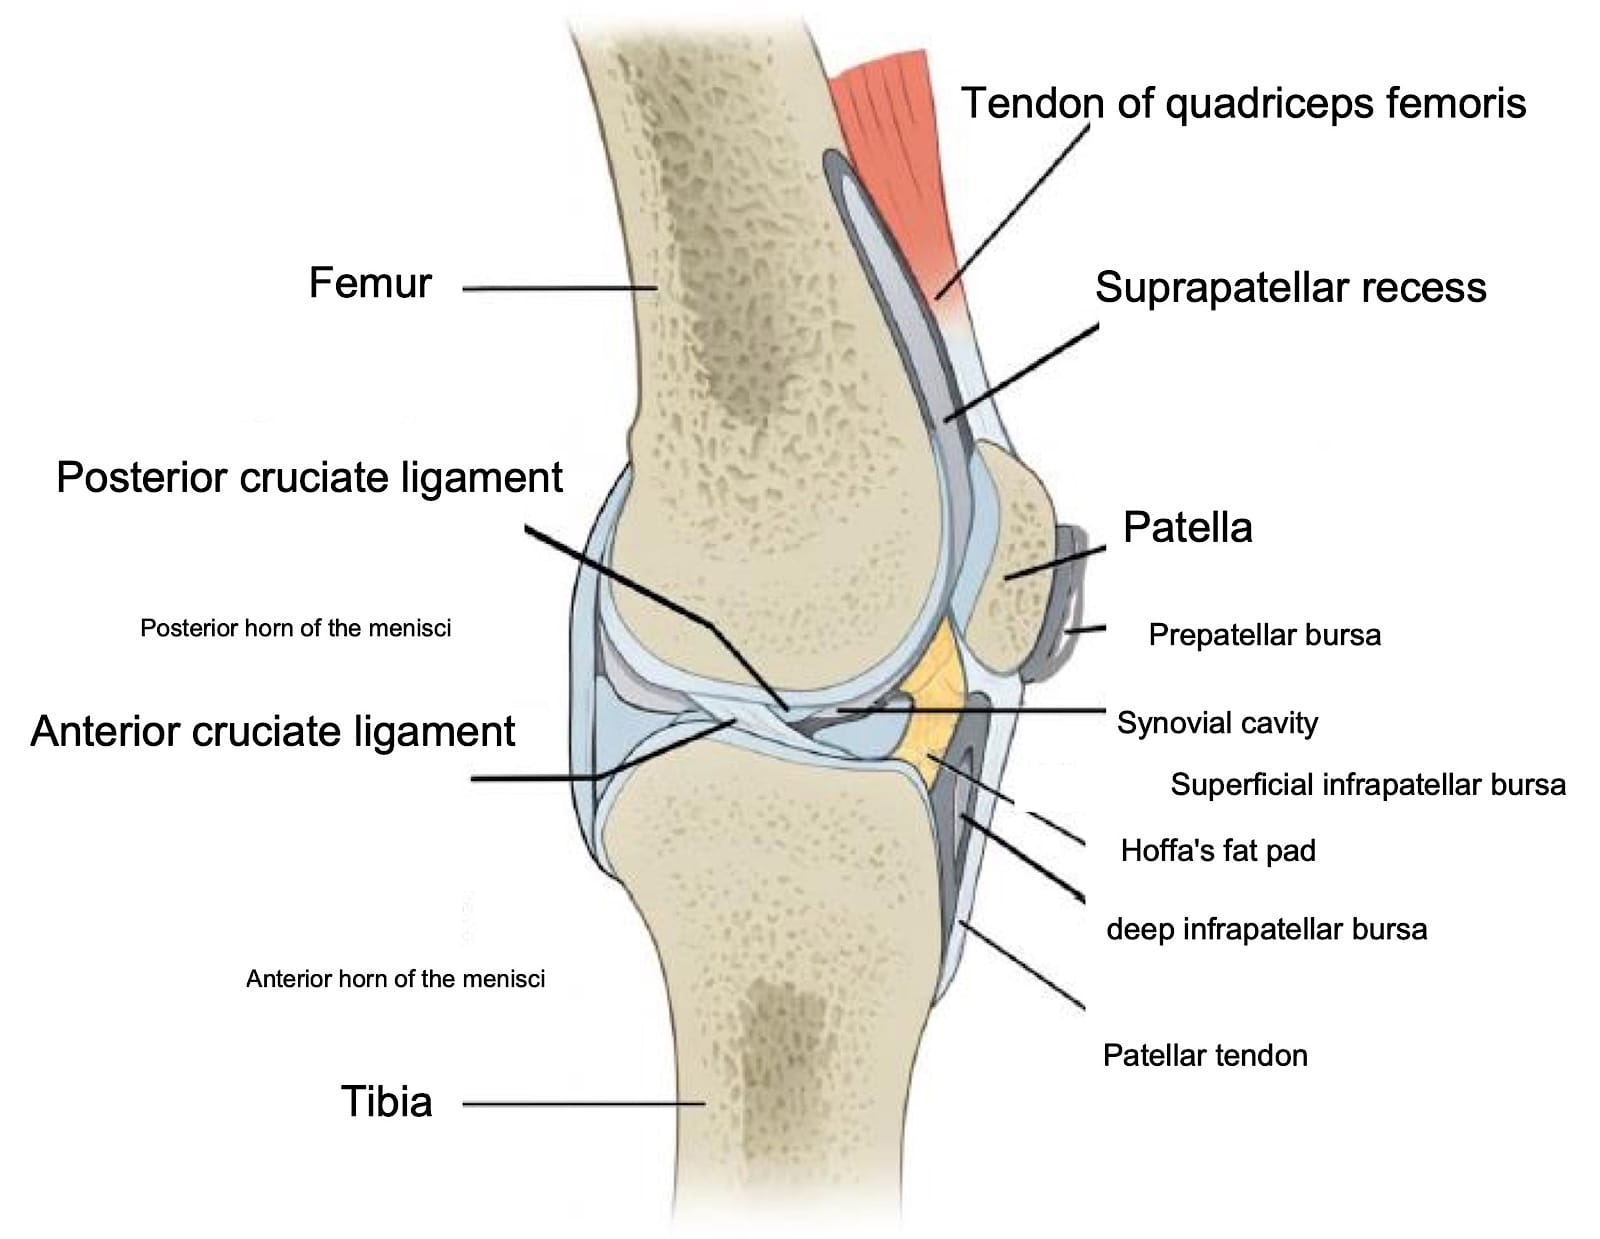
Medial Knee
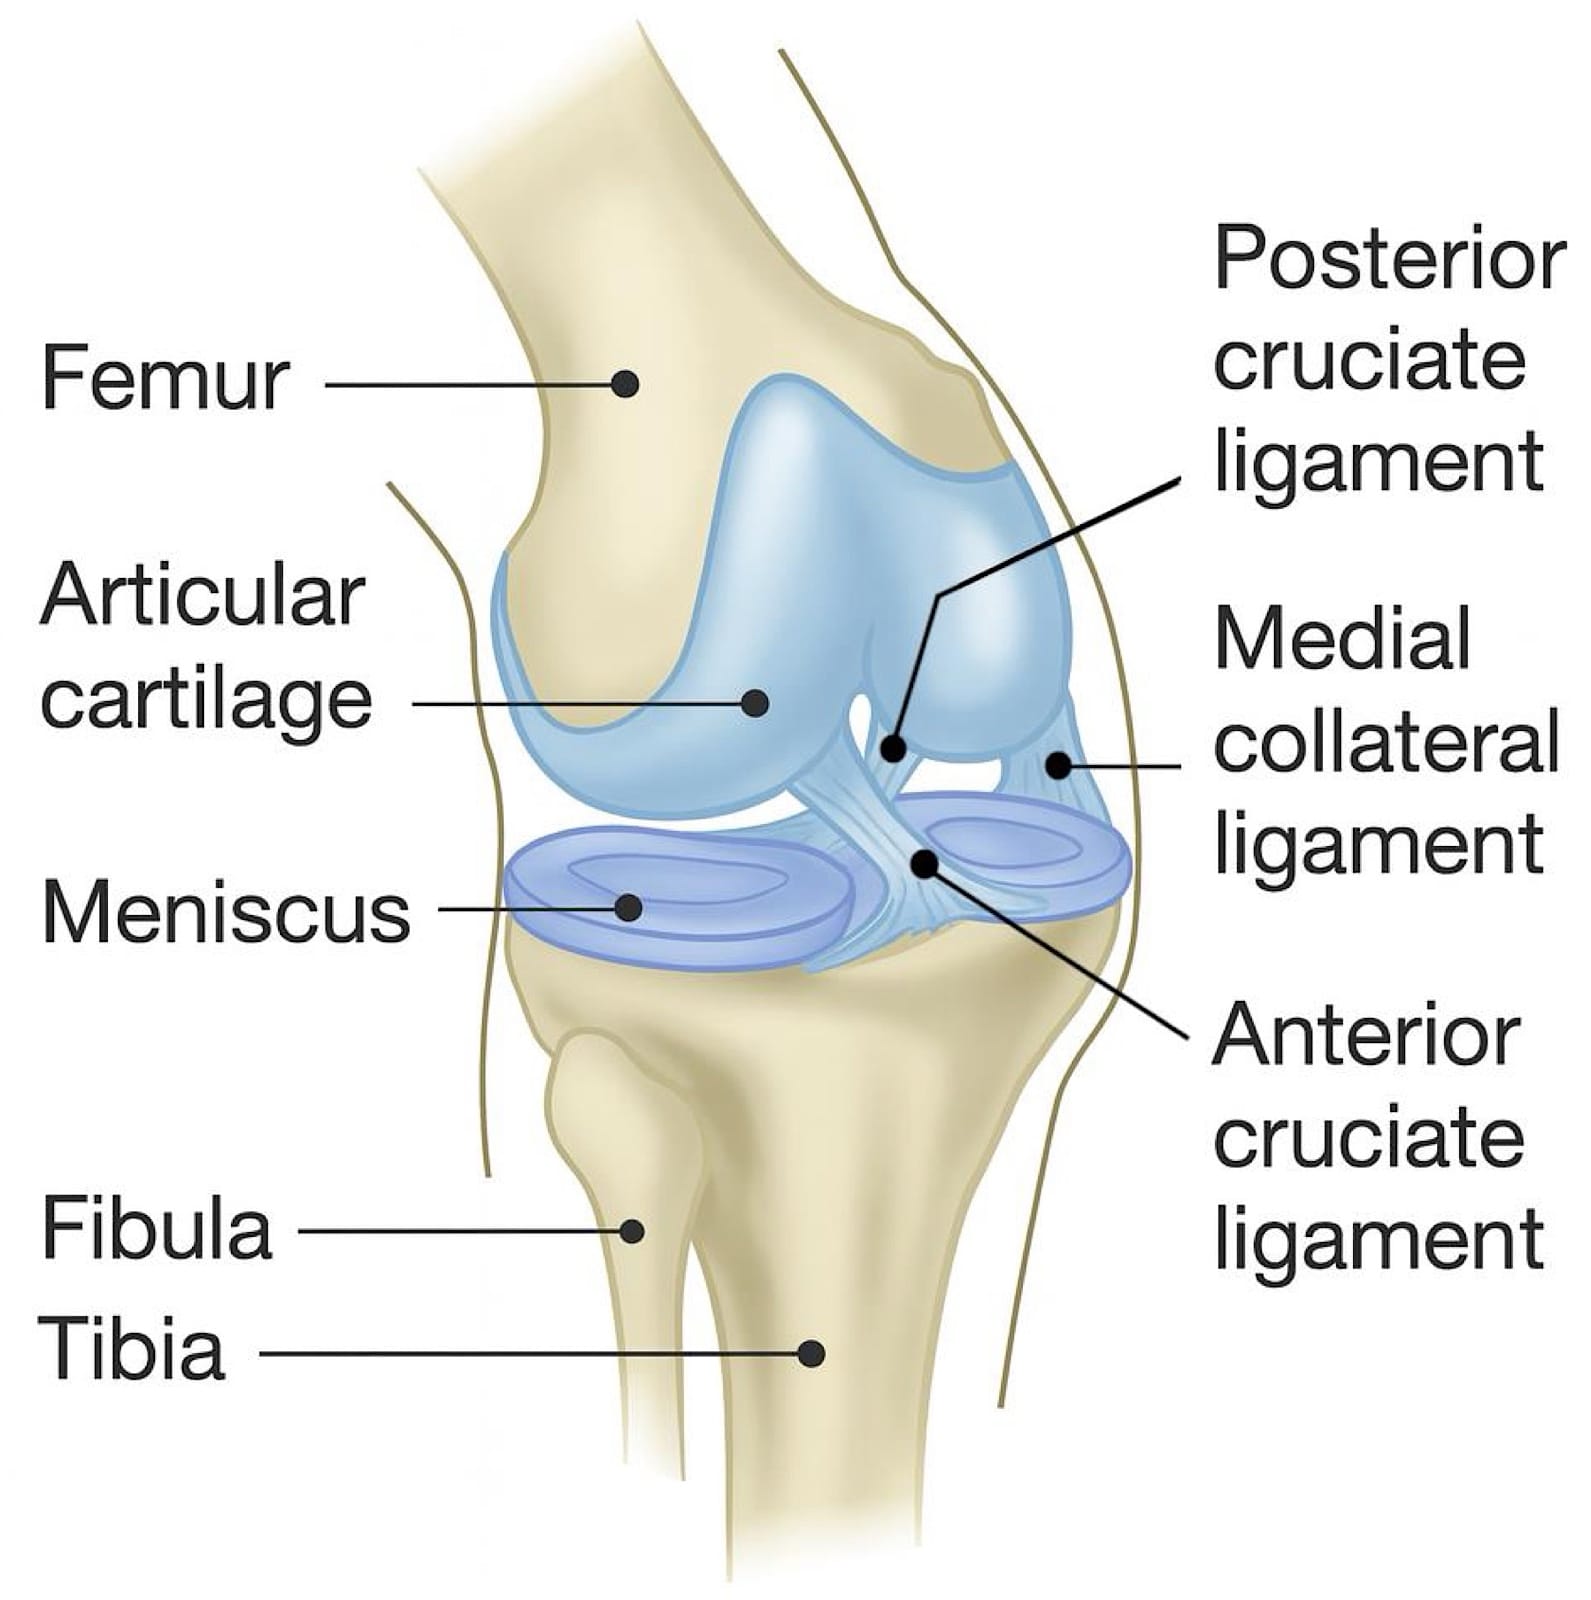
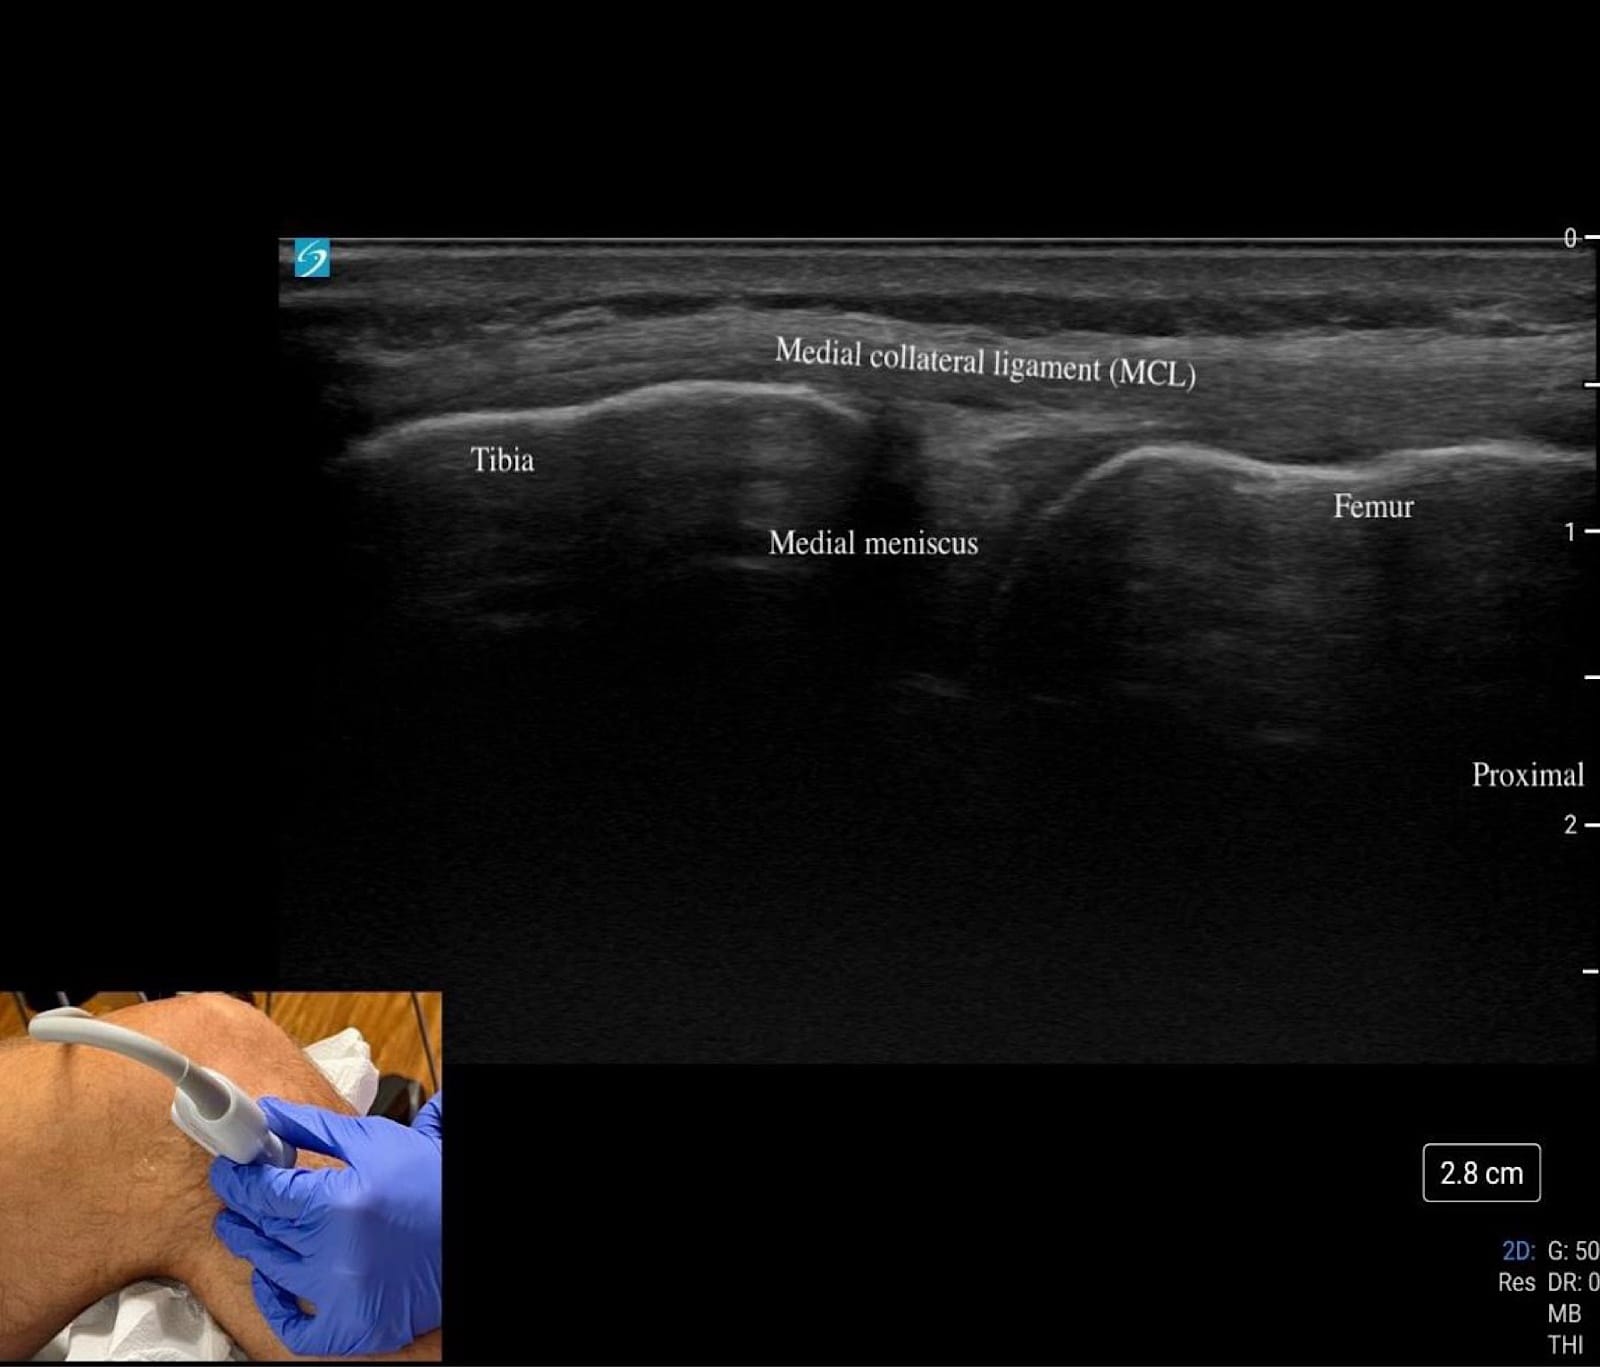
Begin at “home base” by palpating the adductor tubercle on the femur and placing the transducer in long axis over this landmark, scanning distally toward the medial joint line to evaluate the MCL, which inserts proximally at the tubercle and distally on the tibia (refer to figure 2). The MCL should appear as a thin, homogeneous, hypoechoic to mildly hyperechoic, fibrillar band (refer to figure 6C); dynamic valgus stress at 20–30° flexion can help demonstrate fiber laxity or discontinuity in cases of a sprain or tear.
At the medial joint line, identify the femur superiorly and tibia inferiorly as bony landmarks. Sweep posteriorly and anteriorly along the joint line to assess the medial meniscus, looking for hypoechoic clefts, adjacent fluid, or parameniscal cysts suggestive of tear or extrusion (refer to Figure 6C).
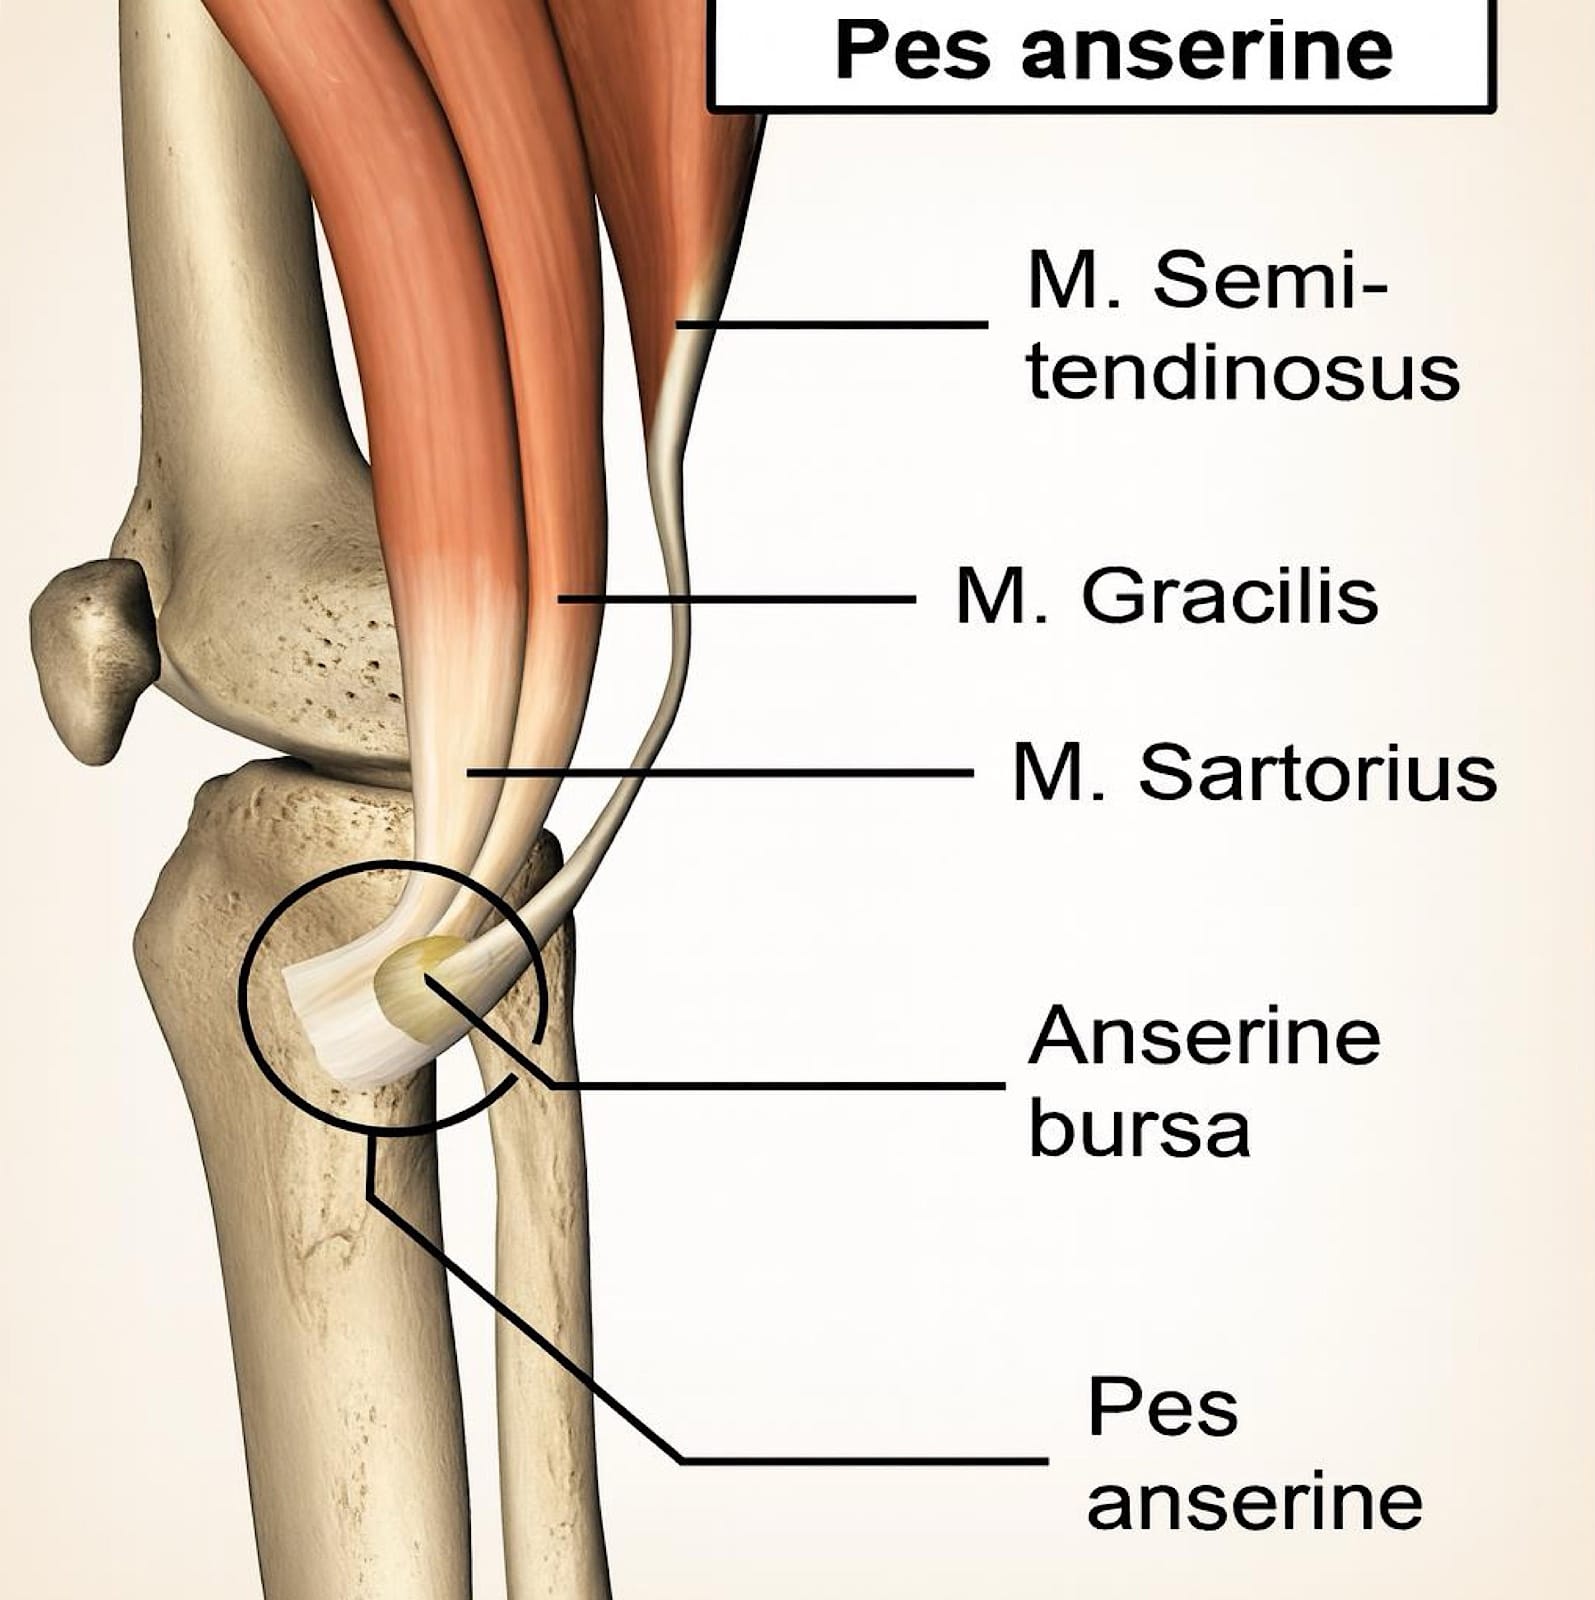
Key Structures: Medial collateral ligament (MCL), medial meniscus, pes anserine tendons/bursa (Figures 6A-C).
Pathology
- MCL sprain – fiber thickening, disruption, and/or more pronounced hypoechogenicity.
- Meniscal extrusion or parameniscal cysts – displacement or cystic change at the joint line.
- Pes anserine bursitis – although rare, a fluid collection can be observed deep in the pes anserine tendons.
Lateral Knee
Start at “home base” by palpating Gerdy’s tubercle on the lateral tibia and the lateral femoral condyle, then place the transducer between these landmarks to identify the IT band as it courses superficially toward its distal insertion at Gerdy’s tubercle (refer to figure 7 and figure 3).
Trace the IT band proximally in long axis over the lateral femoral condyle, then rotate into short axis to scan anteriorly and posteriorly, with attention to focal thickening or fluid collection. Returning to the joint line, visualize the lateral femoral condyle superiorly and tibial plateau inferiorly as landmarks, then sweep anteriorly and posteriorly to evaluate the lateral meniscus for extrusion, clefts, or parameniscal cysts (refer to figure 7).
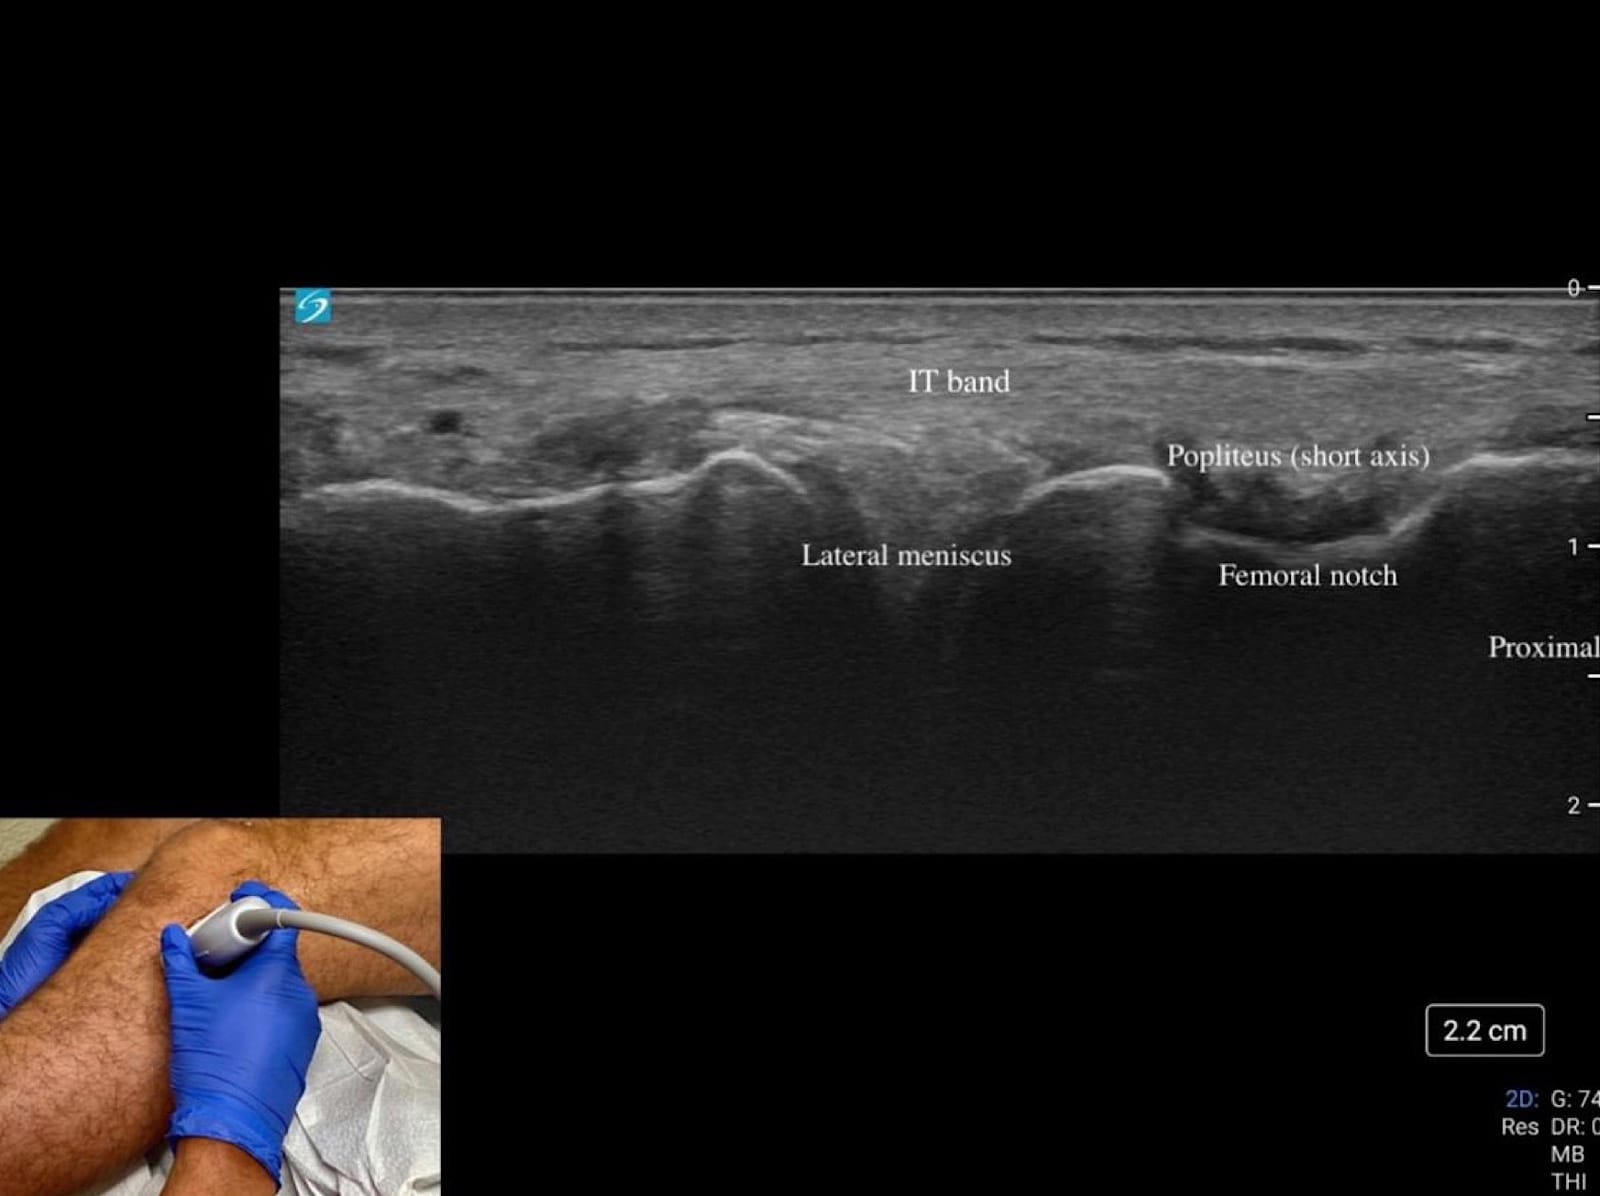
Translate posteriorly while tilting the transducer anteriorly to optimize the visibility of the meniscus body. This action will also reveal the popliteus tendon within the femoral notch, seen as a small hyperechoic structure in the short axis. Finally, assess the LCL as a thin echogenic band extending from the lateral femoral epicondyle to the fibular head, applying varus stress to evaluate its integrity dynamically.
Key Structures: Lateral collateral ligament (LCL), iliotibial band, lateral meniscus (Figure 7 and Figure 8A).
Pathology
- LCL sprain – similar sonographic findings to MCL.
- IT band pathology – thickening or focal hypoechogenicity.
- Meniscal extrusion/cysts as on medial side.
Posterior Knee
Begin at “home base” by palpating the semitendinosus tendon, felt as the medial string-like tendon on the posterior thigh. From here, sweep laterally and tilt the transducer between the semimembranosus tendon and the medial head of the gastrocnemius (refer to figures 8B-C and figure 4); persistent hypoechogenicity in this interval represents fluid within a Baker’s cyst (refer to figure 8C).
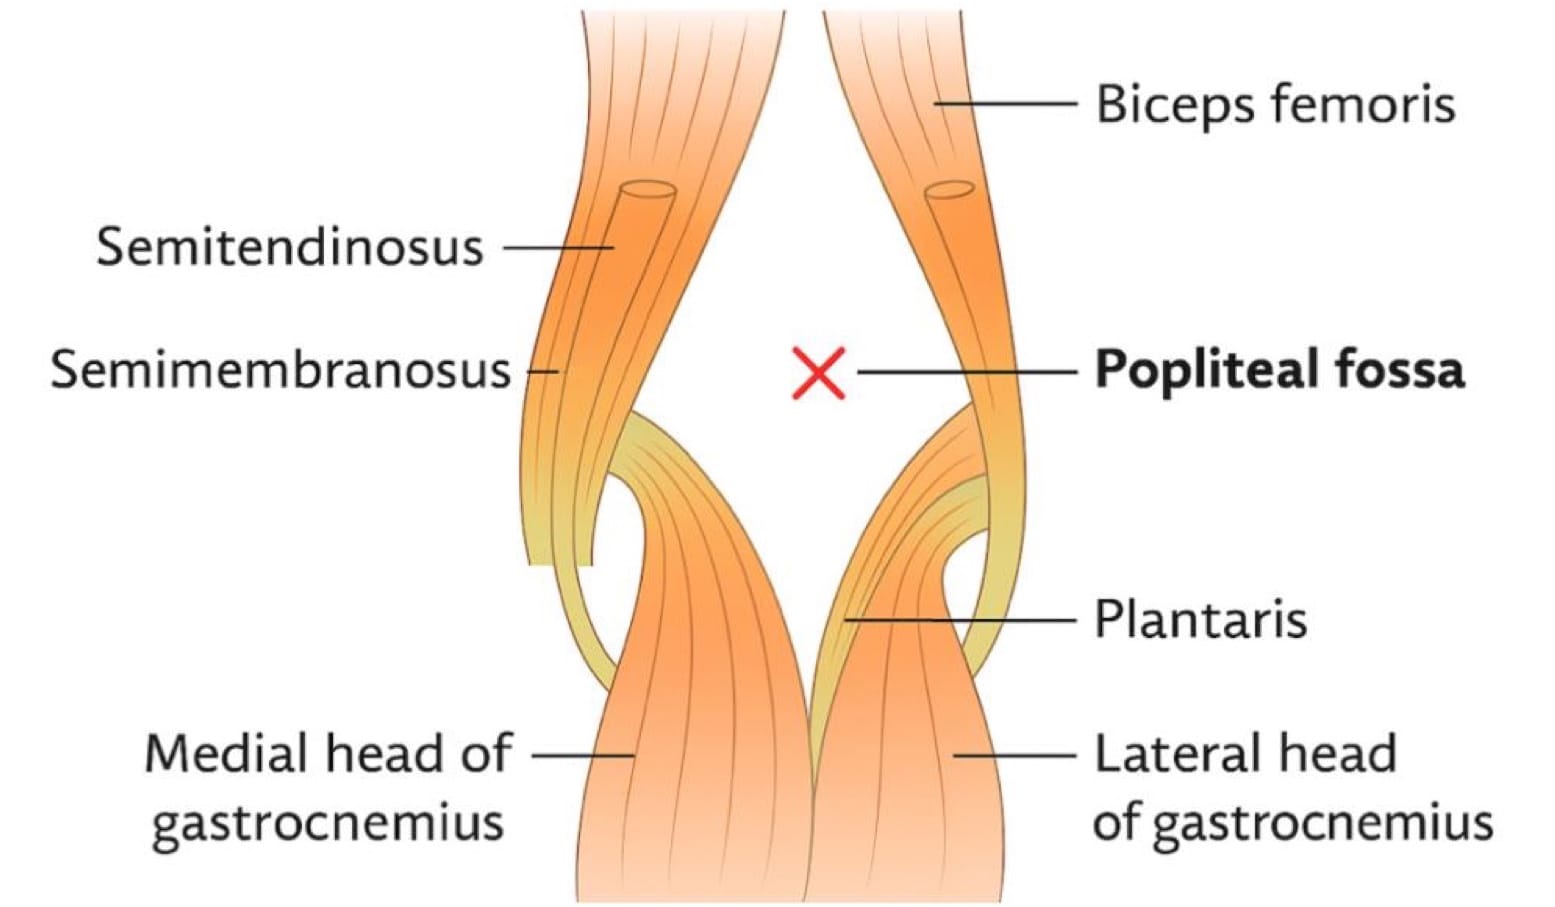
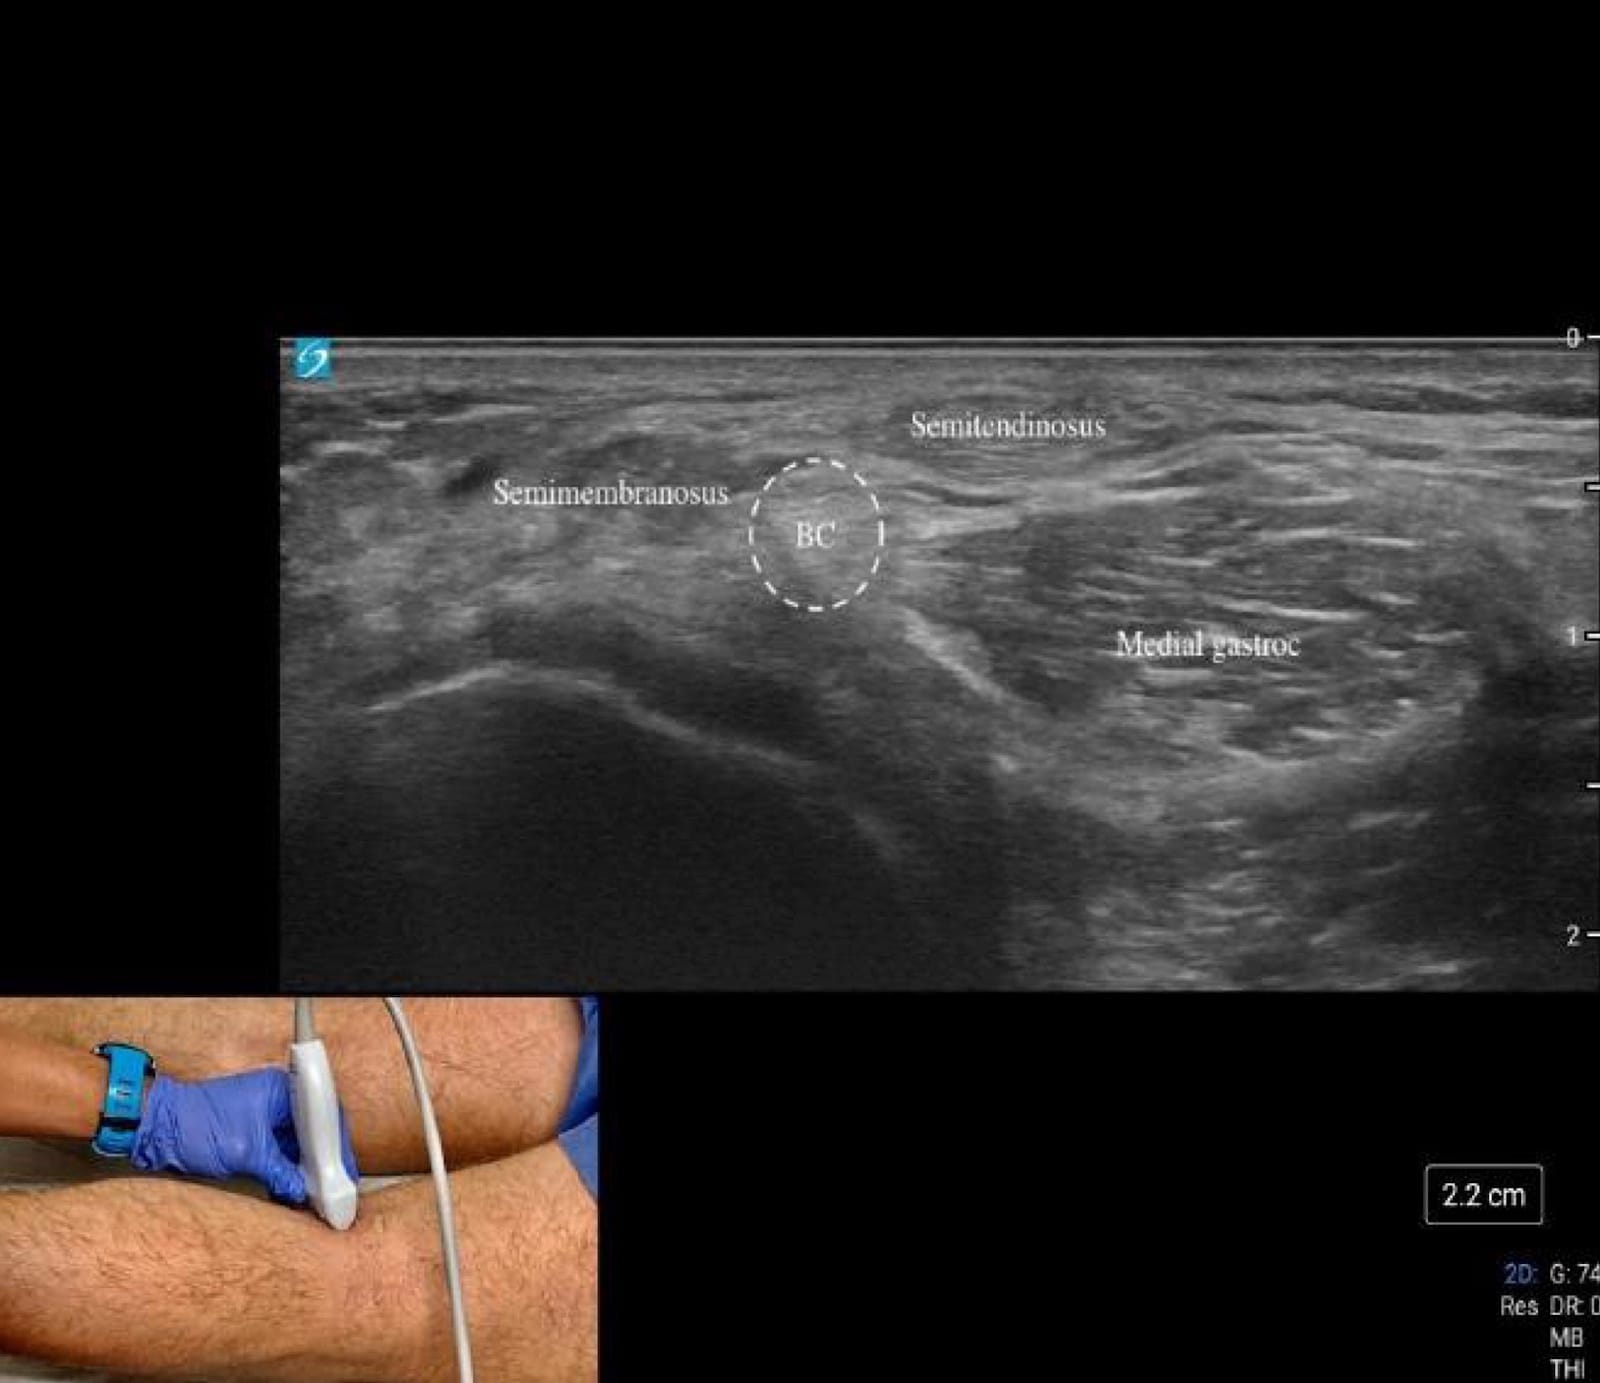
Next, follow the semimembranosus tendon distally in short axis as it broadens toward its tibial insertion, being mindful that anisotropy is common due to the steep fiber angle. Rotate into the long axis to track the tendon onto its tibial attachment, identifying the tibia distally as a hyperechoic bony landmark and the femur proximally, where overlying femoral cartilage can be evaluated. This systematic sweep allows for rapid assessment of the posterior joint space, key tendons, potential fluid collections, and adjacent osseous structures in a single diagnostic sequence.
Key Structures: Semimembranosus tendon, medial/lateral gastrocnemius heads, popliteal fossa (Figures 8A-C).
Pathology
- Baker’s cyst – anechoic/complex fluid collection between semimembranosus and medial gastrocnemius, often communicating with the joint (Figure 4C).
- Mass or thrombosis mimic – complex/solid lesions that warrant MRI.
Treatment and Next Steps
Tendinopathy: Activity modification, eccentric rehabilitation exercises, extracorporeal shockwave therapy, +/- ultrasound-guided injection/needling.
Effusion: Consider aspiration +/- analysis; manage underlying etiology.
Inflammatory arthritis: Rheumatology referral, therapy monitoring with serial scans.
Baker’s cyst: Aspiration/injection if symptomatic; MRI if complex or atypical.
Normal scan + persistent mechanical symptoms: MRI for intra-articular pathology.
Summary
Diagnostic ultrasound is a valuable, real-time imaging tool that enhances the evaluation of knee pain by providing detailed views of soft tissue structures and joint pathology. Its accessibility, safety, and dynamic capabilities make it an essential part of musculoskeletal assessment and a practical guide for both diagnosis and treatment planning. As technology advances, its role in clinical decision-making continues to grow.




References
- Wu WT, Chang KV, Hsu YC, et al. Artifacts in musculoskeletal ultrasonography: from physics to clinics. Diagnostics (Basel) 2020;10(9):645. https://doi.org/10.3390/diagnostics10090645
- Tamborrini G, Micheroli R, Ricci V, et al. Enhancing knee imaging via histology and anatomy-driven high-resolution musculoskeletal ultrasound. J Ultrason 2025;25(100):20250008. https://doi.org/10.15557/jou.2025.0008